Assigning a request
Roles and permissions
The following roles can assign a request:
Administrators
Compliance managers
Users
When a request is assigned to a team member, they’ll receive an email notification and/or a Slack/Microsoft Teams notification depending on their notification preferences. If another user makes a change to a request, e.g. changing the due date or updating the status, the assignee does not receive a notification.
Note
Assigning a Hyperproof object or task to yourself doesn't send a notification to you.
Note
The user assigned to upload proof to a request, continues to receive notifications about that request until it is set to Approved or Closed, even if they have uploaded the requested proof.
Note that to receive Slack or Microsoft Teams notifications, your organization must have the integration turned on. For more information on the integrations, refer to Integrations.
Assigning a user or group to a single request
Note
Request assignees must be Hyperproof users and able to log in to Hyperproof to complete the request. Contacts can't be assigned to requests because they can't log in to Hyperproof.
From the left menu, select Audits or Assessments.
Select your audit or assessment.
Select the Requests tab.
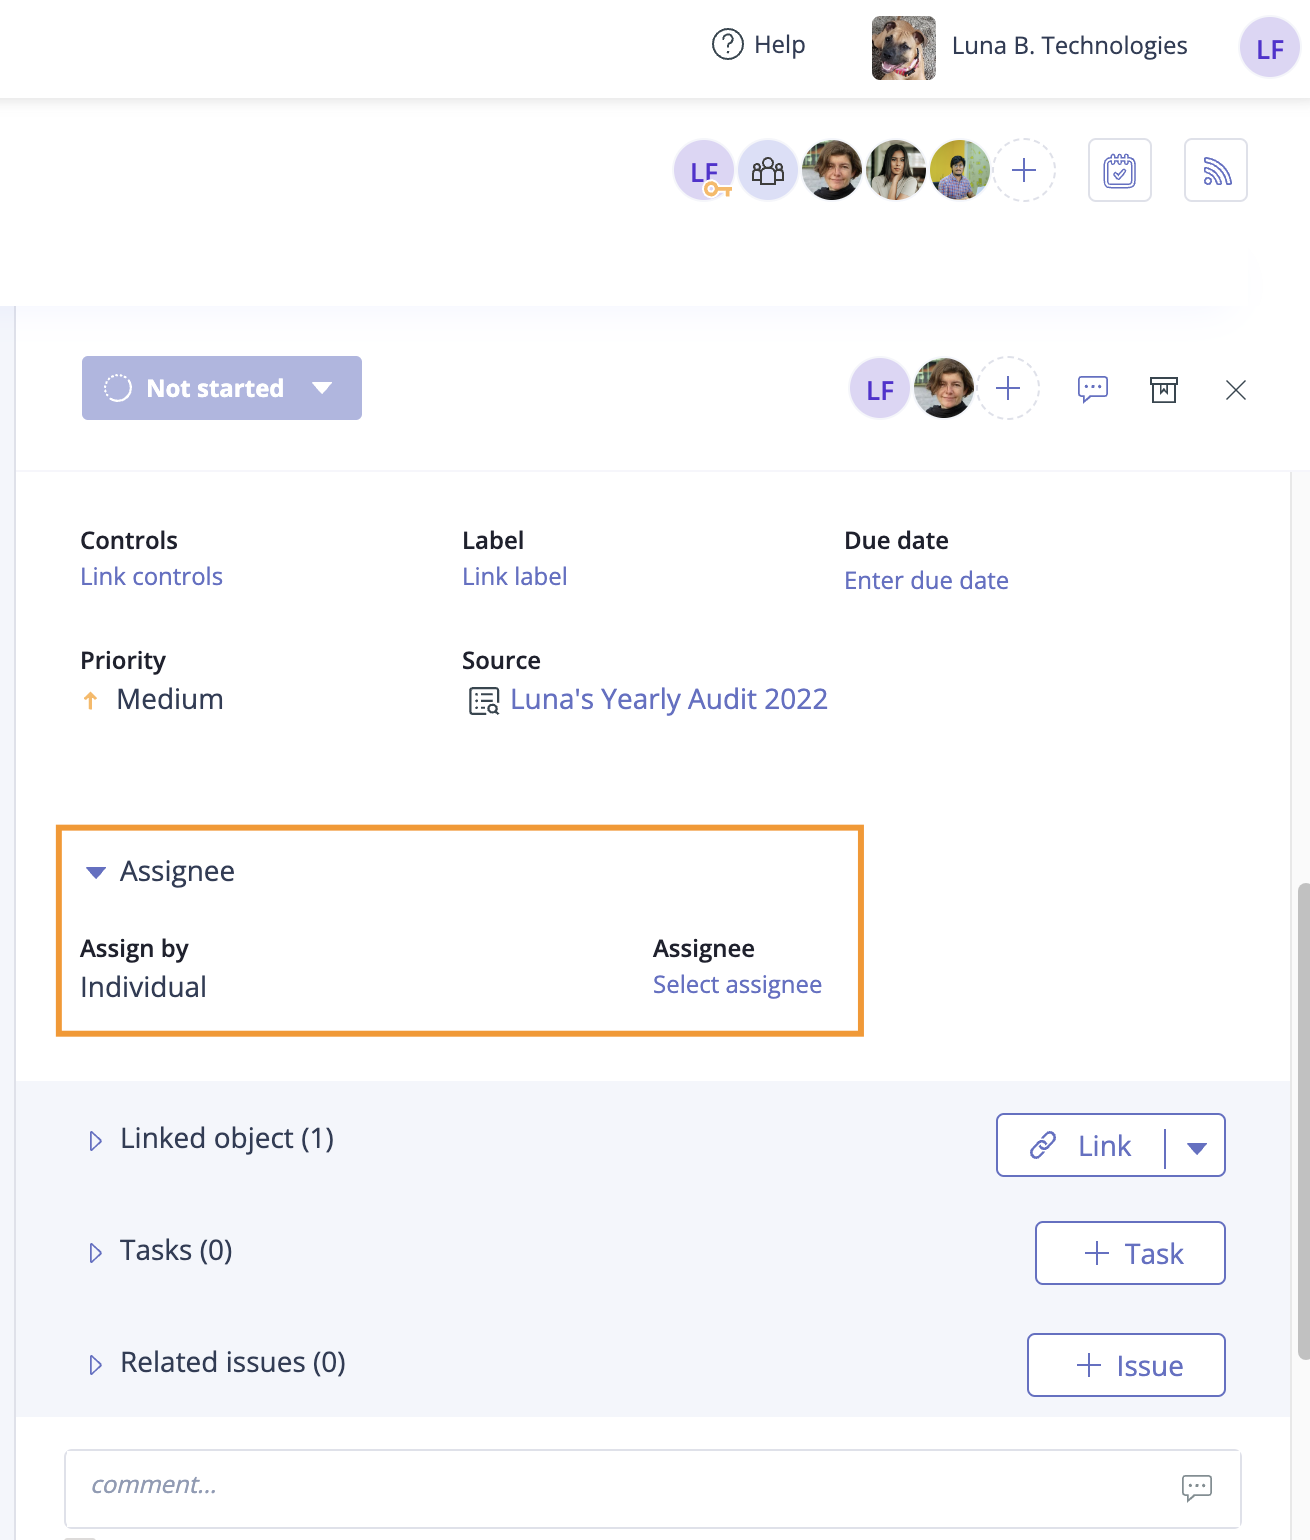
Select the request you want to assign a user or group to.
In the right pane, expand the Assignee section.

Do one of the following:
To assign the request to an individual assignee, hover over the current assignee, then click the Edit icon. Select a new assignee from the drop-down menu.
To assign the request to a group, hover over Individual, then select Group. Click Select group. Select a group from the drop-down menu. If the group has a designated lead, that individual automatically becomes the owner. If the group doesn't have a lead, you can hover over the current owner and select a new owner.
Hyperproof automatically saves your changes.
Assigning a user or group to requests in bulk
The steps below explain how to assign multiple requests to a user or group at once.
From the left menu, select Audits or Assessments.
Select your audit or assessment.
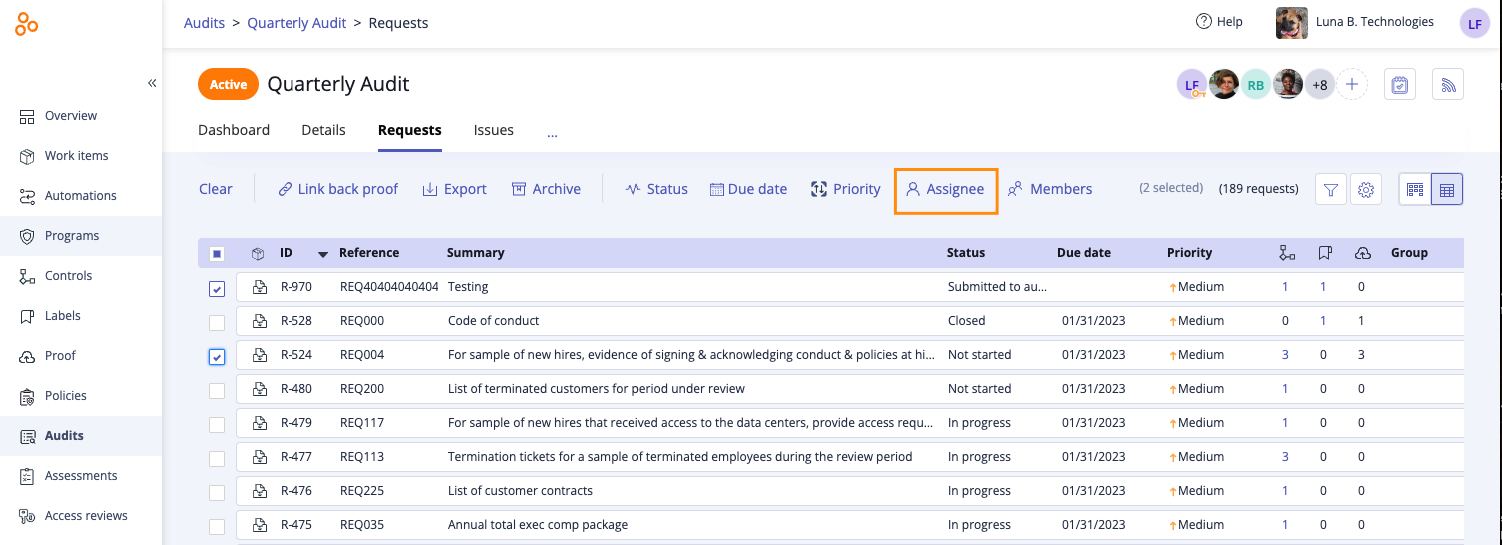
Select the Requests tab.
Click the Grid view icon.

Select the checkboxes next to the requests you want to edit.
Click Assignee.

The Edit assignee window opens.
Do one of the following:
To change the individual assignee, hover over the current assignee, then click the Edit icon. Select a new assignee from the drop-down menu.
To change the assignee to a group, hover over Individual, then select Group. Click Select group. Select a group from the drop-down menu. If the group has a designated lead, that individual automatically becomes the assignee. If the group doesn't have a lead, you can hover over the current assignee and select a new assignee.
Click Review.
The Review and confirm window opens.
Click Confirm.
The requests are assigned to the user or group.

