Resolving testing failures
Failed tests must be addressed for the testing status of a control to be Effective. Testing statuses on controls and labels are calculated as:
The testing status is Ineffective if the test fails.
The testing status is In progress if a test needs to be reviewed further or is in remediation.
The testing status is Effective if a test passes or is resolved.

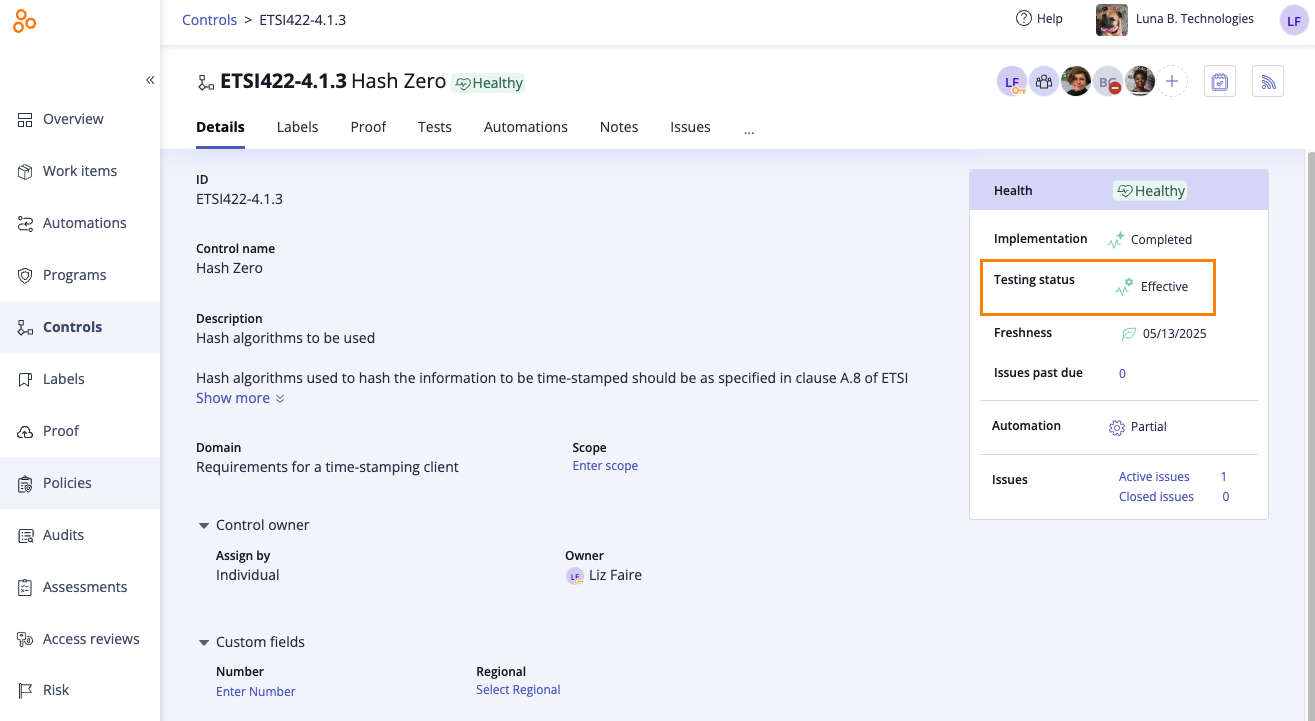
The testing status of a control is found on the Details page of the control.
Note
If a label is linked to a control, and the label has a test, the test results of the label are also considered when calculating the testing status. To determine if a failed test is attributed to the linked label, open the label and examine the test results.
Note that if the testing status of a control is manually set, test results no longer affect the status.
Viewing test results from the Overview dashboard
From the left menu, select Overview.
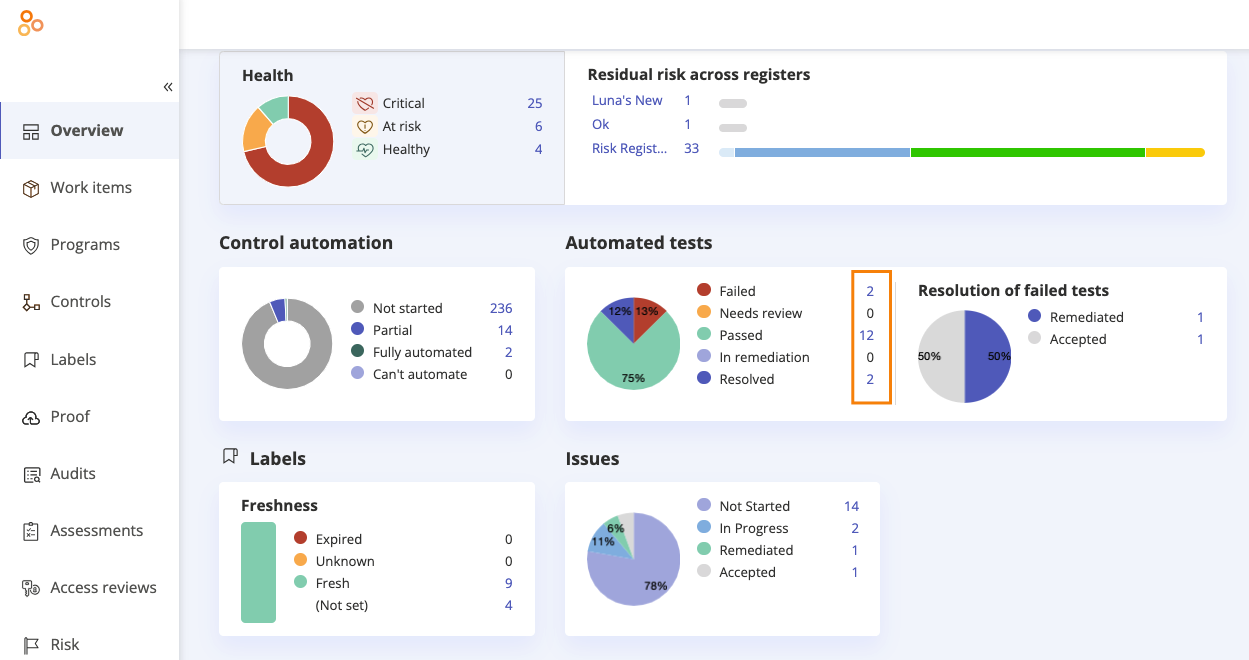
Locate the Automated tests widget.

Do any or all of the following:
Click the number link next to 'Failed' to view a list of failed tests.
Click the number link next to 'Needs review' to view test results that need additional reviewing.
Click the number link next to 'In remediation' to view tests that are currently being remediated.
Viewing test results on a control or label
Follow the steps below to view the test results on a control or label.
From the left menu, select Controls or Labels.
Select the control or label that corresponds with the test results you want to view.
Select the Tests tab.

Below Test results, click the ID of the test you want to view.
The test results are displayed.
Tip
If the calculated testing status of the control is 'Ineffective' and no direct test result is apparent, take a look at the associated label or labels. One of them may contain a failed or pending test result that requires attention. To quickly examine a linked label:
Within the control, select the Labels tab.
Select the label.
Select the Tests tab.
Below Test results, click the ID of the test you want to view.
Addressing test results
The first step to understanding a failed test is to examine the failed test case or cases. Follow the steps below to effectively interpret and address your test results.
In the test results, locate the Test cases section. This section displays the outcome of each test case along with the count of failed rows in the proof.
Locate a failed test case, then click See more details.
The Test result details window opens. This window displays a preview of the proof, with any failed cells.
Repeat step 2 as necessary.
From the Result drop-down menu, select one of the following statuses:
Needs review - A team member needs to review the result to decide whether it is acceptable or requires remediation.
In remediation - The application from which the Hypersync obtains the proof is being updated to address the failure.
Resolved - The team resolved the failure.
Remediated - The application and/or Hypersync has been updated.
Accepted - The failure is acceptable and should be ignored when calculating the test results.
Note
Manually resolving a test result may lead to a failure when the test is rerun, as the underlying issue might not have been addressed. When possible, the application that is the source of Hypersync—for example, AWS or GitHub—should be updated to avoid ongoing failures.
Note
Tests are run when the linked Hypersync uploads new proof. If there is an error in the test case, it needs to be addressed. Refer to Editing an automated test and Test logic troubleshooting
Hypersync versioning versus new files
If you select 'Versioning', Hyperproof creates a new version of the file each time the Hypersync syncs. If you select 'New files', Hyperproof creates a new file each time the Hypersync syncs.
When 'Add proof using' is configured for 'Versioning', new proof is uploaded only when there is a change in the data. When 'Add proof using' is configured for 'New files', new proof is uploaded every time the Hypersync runs. See Versioning versus new files
How can I be notified when a test fails?
To proactively receive notifications upon test failures, it's recommended to configure a repeating task that is automatically generated whenever a test result indicates a failure. A repeating task can be created when a test is created. See Creating and running an automated control test
If you didn't create a repeating task when you created the test, you can still add a repeating task:
From the left menu, select Controls or Labels.
Select the control or label that corresponds with the test.
Select the Automations tab.
Click New repeating task.
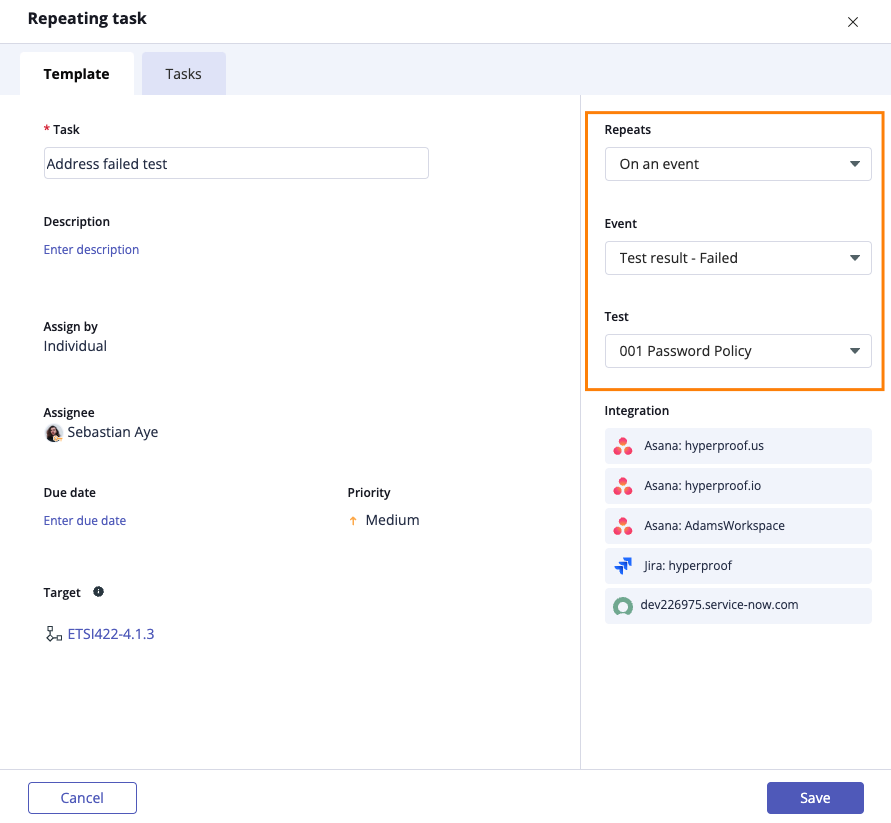
The Repeating task window opens.
Enter the necessary information. Be sure to do the following:
From the Repeats drop-down menu, select On an event.
From the Event drop-down menu, select Test result - Failed OR Test result - Needs review.
From the Test drop-down menu, select the test to trigger the repeating task. Note that each test on a control or label must have its own repeating task.

See Creating a repeating task for more information on creating a new repeating task.
Note
A repeating task is created when a new test result fails or needs to be reviewed. If a repeating task does not yet exist, or its status is 'Submitted', 'Closed', or 'Canceled', a new repeating task is created. If a repeating task for the test already exists and its status is 'Not started' or 'In progress', the test result is added to the existing task.