Importing a directory from a CSV file
Roles and permissions
People with the following object roles can add a directory of company employees to an access review:
Manager or contributor permissions for the access review
During the access review setup process, you create a directory of employees, consultants, or interns. This information is combined with user records for specific apps to provide additional information during an access review. You can either import a company directory from a CSV file or create a Hypersync to retrieve the data and add it to your access review. To configure a Hypersync see Importing a directory with a Hypersync.
Note
If you plan to assign users' direct managers as reviewers for application user access lists, be sure that the directory you are importing has the name and email address of each employee's manager. If that information is missing and you select Direct manager as the reviewer when configuring your application user lists, the default sysadmin is assigned as the reviewer. See Using direct managers as reviewers for user access.
The general process for importing a directory is as follows:
Export the list from the Human Resources system or directory service in CSV format.
Transform the exported file to match the Hyperproof template.
Add a new directory to the access review and import the CSV file into that directory.
If you don't have access to the CSV file immediately, you can add the directory and skip the import step. This creates a placeholder directory where you can import the CSV when it is available. See Refreshing a directory.
If you can't export the list from a Human Resources system or directory service you can create the CSV manually using the format of the example CSV file.
The steps below explain how to create and import your directory.
Creating an import CSV
To add a list of your employees in Hyperproof you need to set up a CSV file with specific employee information. In most cases, that set of employee data can be exported from a directory service or Human Resources system in your organization. If you are working with exported data, you may need to transform the data to meet the requirements of the CSV file. See the CSV fields table below for more information on each field.
If exporting employee data from another system is not an option, you can download a sample CSV and replace the contents with your data. See Downloading the example CSV.
To prepare the CSV file for import:
Export employee data in a CSV format from a directory service or other system that contains your employee records. See the CSV fields table below for information on the data to export.
Open the file in an editor such as Excel to view and modify it for import.
Rename the column headings to match the column names in the CSV fields table shown below.
Combine columns as needed. For example, the import requires an employee's full name in a single field, but your export may have first and last names in separate columns. In this case, the first and last name columns must be combined.
Tip
You can use Microsoft Excel formulas to merge two cells into a single cell.
Importing the CSV file
After configuring the CSV file containing your company directory, you can import it into a directory in Hyperproof. When adding a directory in Hyperproof you can create a new directory and import the CSV file immediately or you can create a directory entry first and then import the CSV later.
From the left menu, select Access reviews.
Select the access review you are setting up.
Select the Setup tab.
To add a new directory entry and import your CSV:
Under Directory click the + New button.
The Add directory window displays.
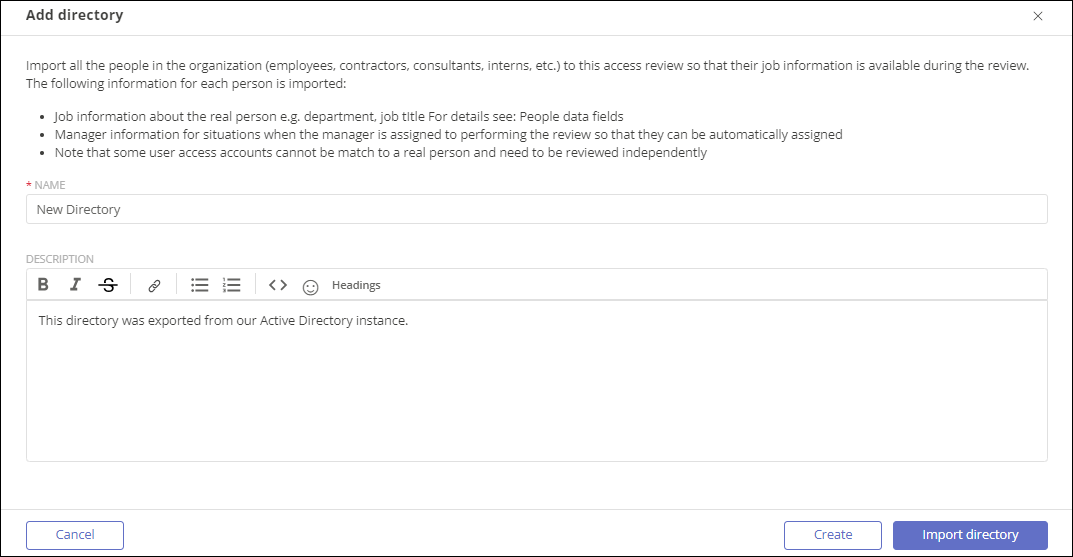
Enter a unique name for the directory. This field is required.
Enter a description for the directory. This field is optional.
If you do not have an import CSV file ready now, click Create to add a directory entry and import the CSV later.
If you have the import CSV file ready, click the Import directory button.
The Choose app window displays.
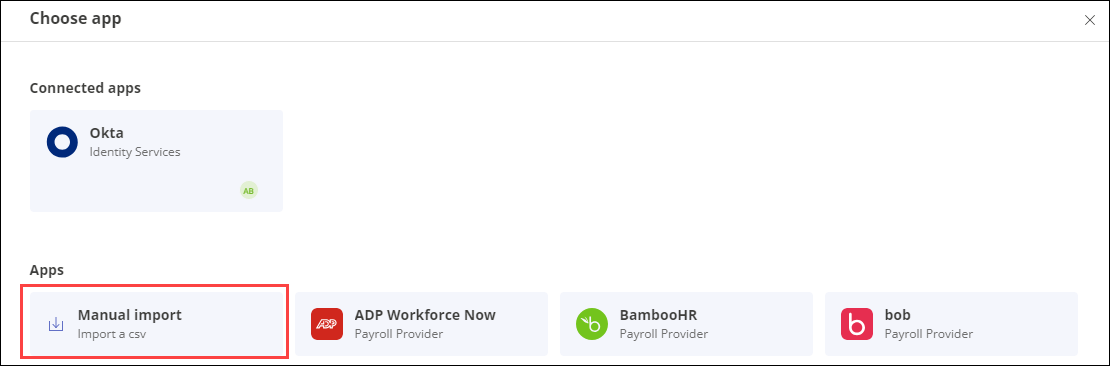
Under Apps, select Manual import.
The Import screen displays. Continue with Step 6.
To import your CSV into an existing empty directory:
Under Directory click the name of the empty directory.
The Details tab for the directory displays.
Click the People tab.
Click the Import link.
The Import screen displays. Continue with Step 6.
Drag-and-drop the CSV file into the Upload CSV File field, or click Select file to upload to browse to the location of the CSV file you want to import.
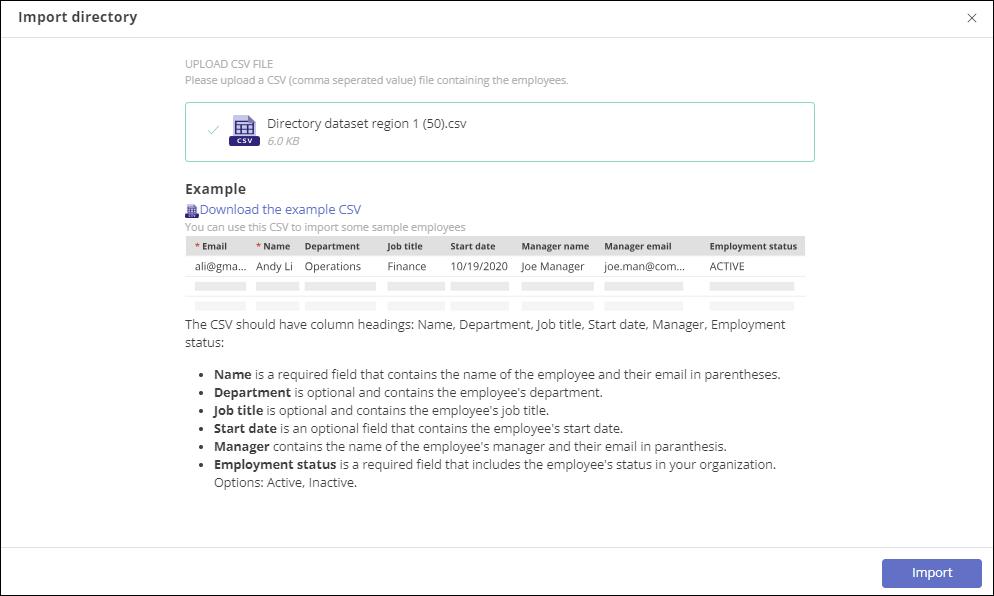
Click Import.
Hyperproof checks the format within the CSV file for errors. If any errors are found, Hyperproof displays an error message.
If Hyperproof didn't detect any errors, click Next. If there are errors, do the following:
Resolve the errors by double-clicking the cell with the highlighted error and correcting the value or correct the errors directly in the CSV and try the import again.
Tip
Use the forward and backward arrows to cycle through the errors. The Error viewer gives specific information on what needs to be corrected.
Remove rows that contain errors by clicking Remove all rows with errors.
Click Next.
The CSV file is imported.
Downloading the example CSV
If you can't export employee data from an existing directory service or Human Resources system, you can manually create your own CSV file. The easiest way to understand the required format for your CSV is to start with the example CSV provided in Hyperproof. The example CSV file provides the exact template for importing your company directory. You can replace the contents of the example CSV file with your data by entering user information.
From the left menu, select Access reviews.
Select the access review you are setting up.
Select the Setup tab.
Under Directory click the + New button.
Enter a unique name for the directory. This field is required.
Enter a description for the directory. This field is optional.
Click the Import directory button.
The Import screen with details about the CSV file is displayed.
Under Example, click the Download the example CSV link.
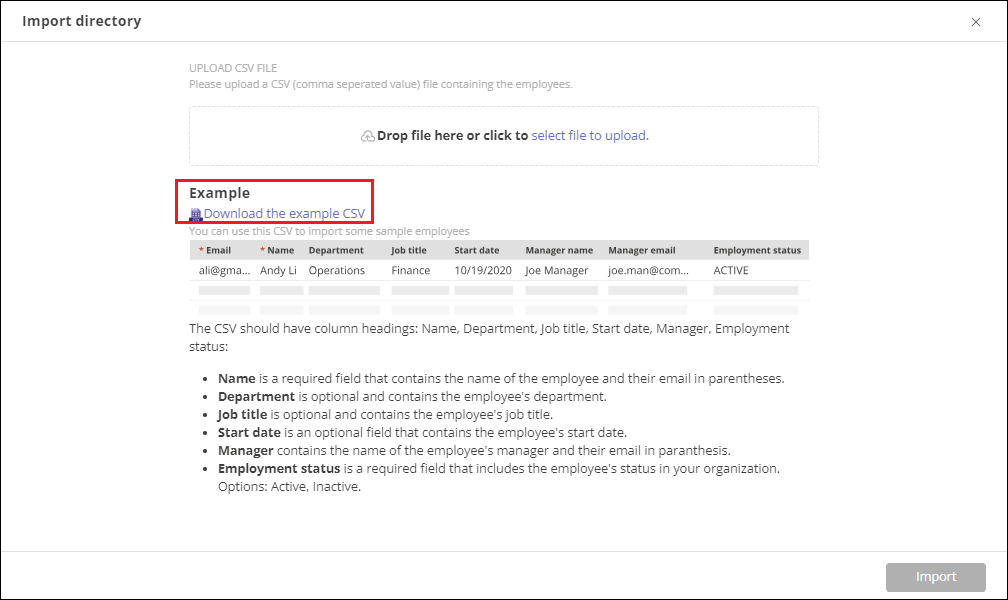
An empty directory is created and the example CSV file is downloaded to your default downloads location. When your CSV file is ready, you can open the empty directory and import the CSV.