Creating and running an automated control test
Roles and permissions
The following roles can create and run a test on a control or label:
Anyone with manager or contributor permissions for the control or the label
Users with inherited access cannot create, run, edit, or view tests because they have not been explicitly added to the control or label.
The steps below assume that you have collected testable proof. You can only test proof collected by a Hypersync or uploaded in a CSV format.
Files in CSV format must have their fields defined before you can configure a test for those files. See Editing the field definitions for a test file.
If you haven't set up a Hypersync on the control or label, refer to How do I start using Hypersyncs?. The left menu of the Help Center provides access to additional instructions for connecting to an app and creating a Hypersync.
Note
You can't create a test and run that test on multiple controls. You must create a test on each control you want to test. Each test tests a single piece of proof.
You can create a test on proof on a label and the results of that test affect all of the controls linked to that label. See Automated control testing for more details.
An automated control test can contain multiple test cases. Each test case can contain multiple conditions to test the value of a single field or compare the values of two fields. To test the value of a single field, add a condition to the test case. To compare the values of two fields, add a relative condition to the test case. Note that you can only compare fields that are the same data type.
To create and run an automated control test:
Prerequisite: A control or label with a proof in CSV format or collected by a Hypersync.
From the left menu, select Controls or Labels.
Select the control or label containing the proof you want to test.
Select the Tests tab.
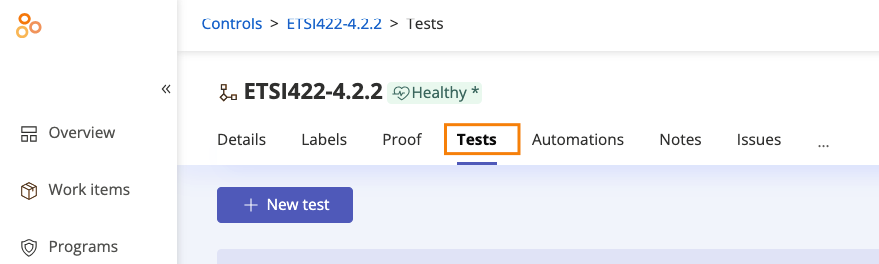
Click New test.
The Automated Test window opens.
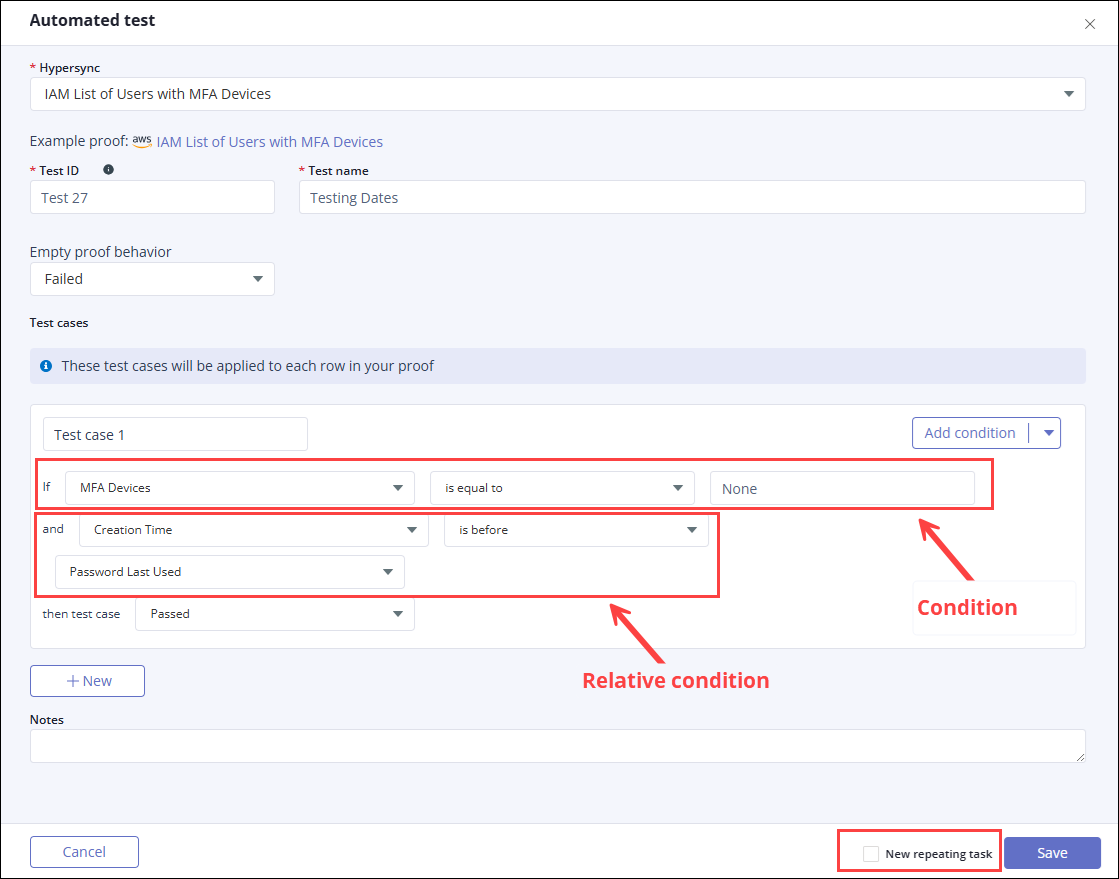
From the Test source drop-down menu, select the proof you want to test. If you are configuring a test on a control the list includes proof configured on the control and on any linked labels. If you are configuring a test on a label only the proof linked to the label is included.
If the test source you want to test is grayed out, that indicates that the fields for that proof haven't been defined, and it can't be tested yet. You must define the fields first. See Editing the field definitions for a test file.
Tip
You can display the proof fields by clicking the Proof link.
Below Test ID, enter the test's ID number. Test IDs must be unique.
Tip
If you are testing a control, include the control ID as part of the Test ID. Example: CC2.1.2-T1
Below Test Name, enter a name for the test.
From the Empty proof behavior drop-down menu, specify what should happen if the linked proof doesn’t include any data. The default result is Failed. Options include:
Passed
Failed
Needs review
Below Pass threshold, indicate the percentage of records in the proof you are testing that must pass for the proof to pass the test. For example, if you have a piece of proof or a CSV file with 100 records and you set the Pass threshold at 80%, then 20 records can fail, and the file will still pass.
Below Test Cases, do the following:
Enter a name for the test case.
Click the drop-down in the Add condition button and select one of the following:
Add condition to add a single field to the test case and test its value.
Add relative condition to add two fields to the test case and compare their values, such as two date fields.
From the Select field drop-down menu, select a field name from the proof being tested.
Note
If you are testing a CSV file, only the fields configured in the field definitions are displayed in the drop-down menu. See Editing the field definitions for a test file.
From the Select comparator drop-down menu, select an operator.
Tip
For more information on fields and operators, see Automated testing: Proof fields and operators.
If you selected Add condition: In the Enter text value field, enter a value. You may need to enter a start date if you selected the Activity start time field. Note that the Enter text value field disappears if you selected the is empty or is not empty operators.
If you selected Add a relative condition: From the second Select field drop-down menu, select the name of the field you want to compare from the proof being tested.
Note
You can only compare fields that are the same data type. For example, if you selected a date field in the first Select field drop-down, only date fields are available in the second Select field drop-down.
Optionally, click the drop-down on the Add condition button again and select Add condition or Add a relative condition to add another condition. Repeat as necessary.
From the drop-down menu next to then test case, select a result.
Passed - The control is performing as it should and is considered to be in good shape.
Failed - The control is not performing as it should.
Needs review - It’s unclear if the control passed or failed, so it needs to be manually reviewed.
Click New to create additional test cases. A maximum of 10 cases are allowed.
Optionally, enter a note in the Notes field.
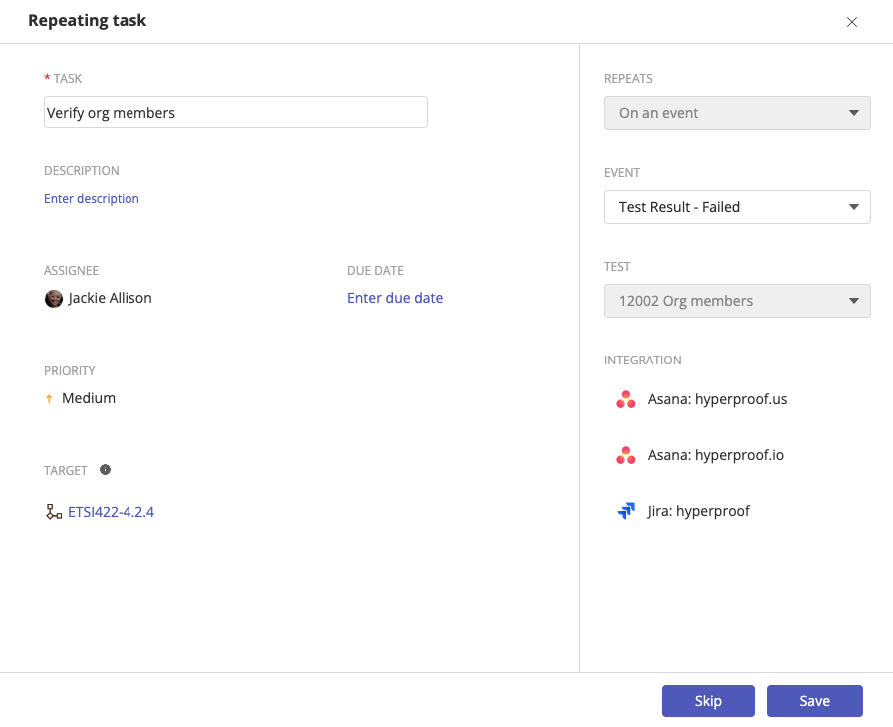
If the test fails or needs review, Hyperproof automatically generates a new task. If you don't want Hyperproof to automatically create a new task, clear the New repeating task checkbox.
If you choose to create a new task, you can define the task, including the task owner and the triggering event, such as if the test fails or needs review.
Hyperproof only generates one new task for each piece of proof that fails. If you re-run the test with the same proof, and the test fails or needs to be reviewed, Hyperproof does not generate an additional task. A new task is only created if the test fails or needs to be reviewed after additional proof is imported into Hyperproof via the Hypersync or a CSV file is uploaded.

Click Save.
The Run test window opens.
Select the proof you want the test to be run against.
Click Run now.
Note
If you don't want to run the test immediately, click Cancel. The test is listed on the Tests tab below Tests. When you're ready to run the test, click the test ID, then click Run test.