Editing scopes
Roles and permissions
Only administrators can edit scopes
Filtering scopes
From the left menu, select Settings.
Select Scopes.
Click the Filter icon.
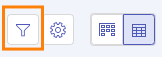
The Filter window opens.
Enter one or more of the following criteria:
Name - Enter a complete or partial scope name.
Owner - Use the drop-down menu to select a team member to view the scopes they own.
Members - Use the drop-down menu to select a team member to view the scopes they're a member of.
Custom fields - Use the drop-down menu to filter by a specific custom field.
Combining filter selections
Multiple selections within the same filter limit results to objects that meet either selection. For example, selecting both Person A and Person B in the By assignee filter shows only objects assigned to either Person A or Person B.
Selections across filters limit the results to objects that meet both filters. For example, selecting Person A from the By assignee filter and Issue from the By type filter only shows objects that are issues assigned to Person A.
Additional example: In the By assignee filter, both Person A and Person B are selected. In the By type filter, both Issue and Task are selected. Hyperproof creates a list of objects that are assigned to either Person A or Person B, and a separate list of objects that are either issues or tasks. It shows the objects that are in both lists.
Filtering controls based on scopes
From the left menu, select Controls.
Click the Filter icon.
The Filter window opens.
From the Scope drop-down menu, select the scope or scopes you want to filter by. You can also select child scopes.
The list automatically updates to show only controls with the selected scope or scopes. Clicking a control takes you to the main control.
To show the scope assignments, select the Expand scopes checkbox. Clicking a control takes you directly to the scope assignment control.
Combining filter selections
Multiple selections within the same filter limit results to objects that meet either selection. For example, selecting both Person A and Person B in the By assignee filter shows only objects assigned to either Person A or Person B.
Selections across filters limit the results to objects that meet both filters. For example, selecting Person A from the By assignee filter and Issue from the By type filter only shows objects that are issues assigned to Person A.
Additional example: In the By assignee filter, both Person A and Person B are selected. In the By type filter, both Issue and Task are selected. Hyperproof creates a list of objects that are assigned to either Person A or Person B, and a separate list of objects that are either issues or tasks. It shows the objects that are in both lists.
Grouping scopes by custom fields
You can group scopes by custom fields when viewing a parent control. This is helpful if your organization has a large number of scopes.
Note
Grouping scopes is only supported for scopes that include custom fields.
Things to keep in mind when grouping scopes by custom fields:
Scopes are listed in order of creation.
Each group can be expanded or closed.
Group health is determined by the scopes within the group.
Scopes that fall into multiple groups are displayed in each group with an asterisk (*).
The Explore by functionality is ordered the same way as in Settings > Scopes.
Tip
Use type-to-search to reduce a large number of scopes down to a manageable number.
From the left menu, select Controls.
Select the parent control.
From the Group by drop-down menu, select the custom field to group by.
A list is displayed with all matching custom fields.
Renaming a scope
Tip
As a best practice, scope names should be searchable by their dimension value(s), e.g. LunaB-NorthAmerica-Cloud, where 'Luna B' is the subsidiary, 'North America' is the region, and 'Cloud' is the software. This allows scopes to act as another layer of data management for your organization. This also applies to scopes without custom fields, e.g. 'HR' for human resources.
Additionally, commas are not supported in scope names.
From the left menu, select Settings.
Select Scopes.
Hover over the scope name you want to edit, then click the Edit icon.
Enter the new name in the Name field, then press Enter.
The scope is renamed.
Changing a scope owner
Note
Changing a scope owner does not affect other Hyperproof objects. The scope owner doesn't change any information on controls with scopes.
From the left menu, select Settings.
Select Scopes.
Hover over the owner name you want to change, then click the Edit icon.
The Edit scope owner window opens.
Select the new owner, then click Review.
The Review and confirm window opens.
Click Confirm.
The owner is changed.
Editing scopes in bulk via the Scopes page
Follow the steps below to edit multiple scopes at once.
From the left menu, select Settings.
Select Scopes.
Select the checkboxes next to the scopes you want to edit.
Do any or all of the following:
Click Archive to archive the selected scopes.
Click Owner to change the owner of the selected scopes. Note that you can only assign one owner to the scopes you selected.
Tip
A contact can be an owner of a scope.
Click Members to add or remove team members to or from the selected scopes.
Click a custom field to link it to the selected scopes.