Creating an assessment
Roles and permissions
The following roles can create an assessment:
Administrators
Compliance managers
Tip
For more information, see the Assessments video at the bottom of the page.
To create an assessment:
Note
You can only assess the controls, requirements , or risks you can access. You must be a member of the control or risk to evaluate it, and a member of the program to evaluate requirements.
From the left menu, select Assessments.
Click New.
The Create new assessment window opens.
Select the type of assessment you want to create.
Control assessment - Evaluate a set of controls to improve their design and effectiveness.
Requirement assessment - Evaluate your compliance posture against a set of requirements to find gaps.
Risk assessment - Evaluate a set of risks to identify gaps, changes, and enhance overall risk.
Click Next.
From the Define assessment details tab, do the following:
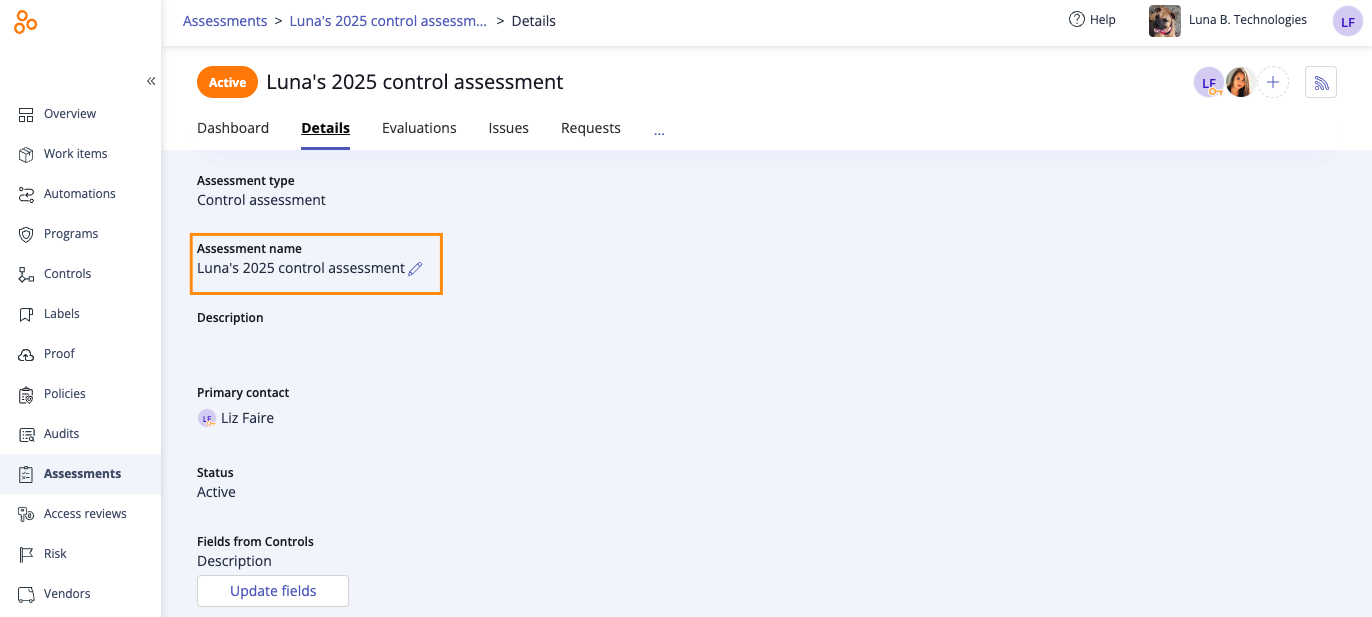
In the Assessment name field, enter a name for the assessment.
Tip
The name of the assessment can be edited from the assessment's Details tab. Select your assessment, then select the Details tab. Hover over the current name, then click the Edit icon.
Optionally, if you want to create the assessment based on a previous assessment, select the Create from a previous assessment checkbox. From the Previous assessment drop-down menu, select the previous assessment.
Additionally, select the Include assignees checkbox to keep the same assignees from the previous assessment.
Optionally, in the Description field, enter an overview of the assessment.
From the Evaluation priority drop-down menu, select a default priority status to be added to all of the evaluations in the assessment. This option is for risk assessments only.
Click the Evaluation due date link to select a default due date to be added to all of the evaluations in the assessment. This option is for risk assessments only.
Click the Default risk register for proposed risks field to select a risk register where proposed risks will be assigned when approved. If you don't select a risk register, you can select one on the risk evaluation record during the approval process. This option is for risk assessments only.
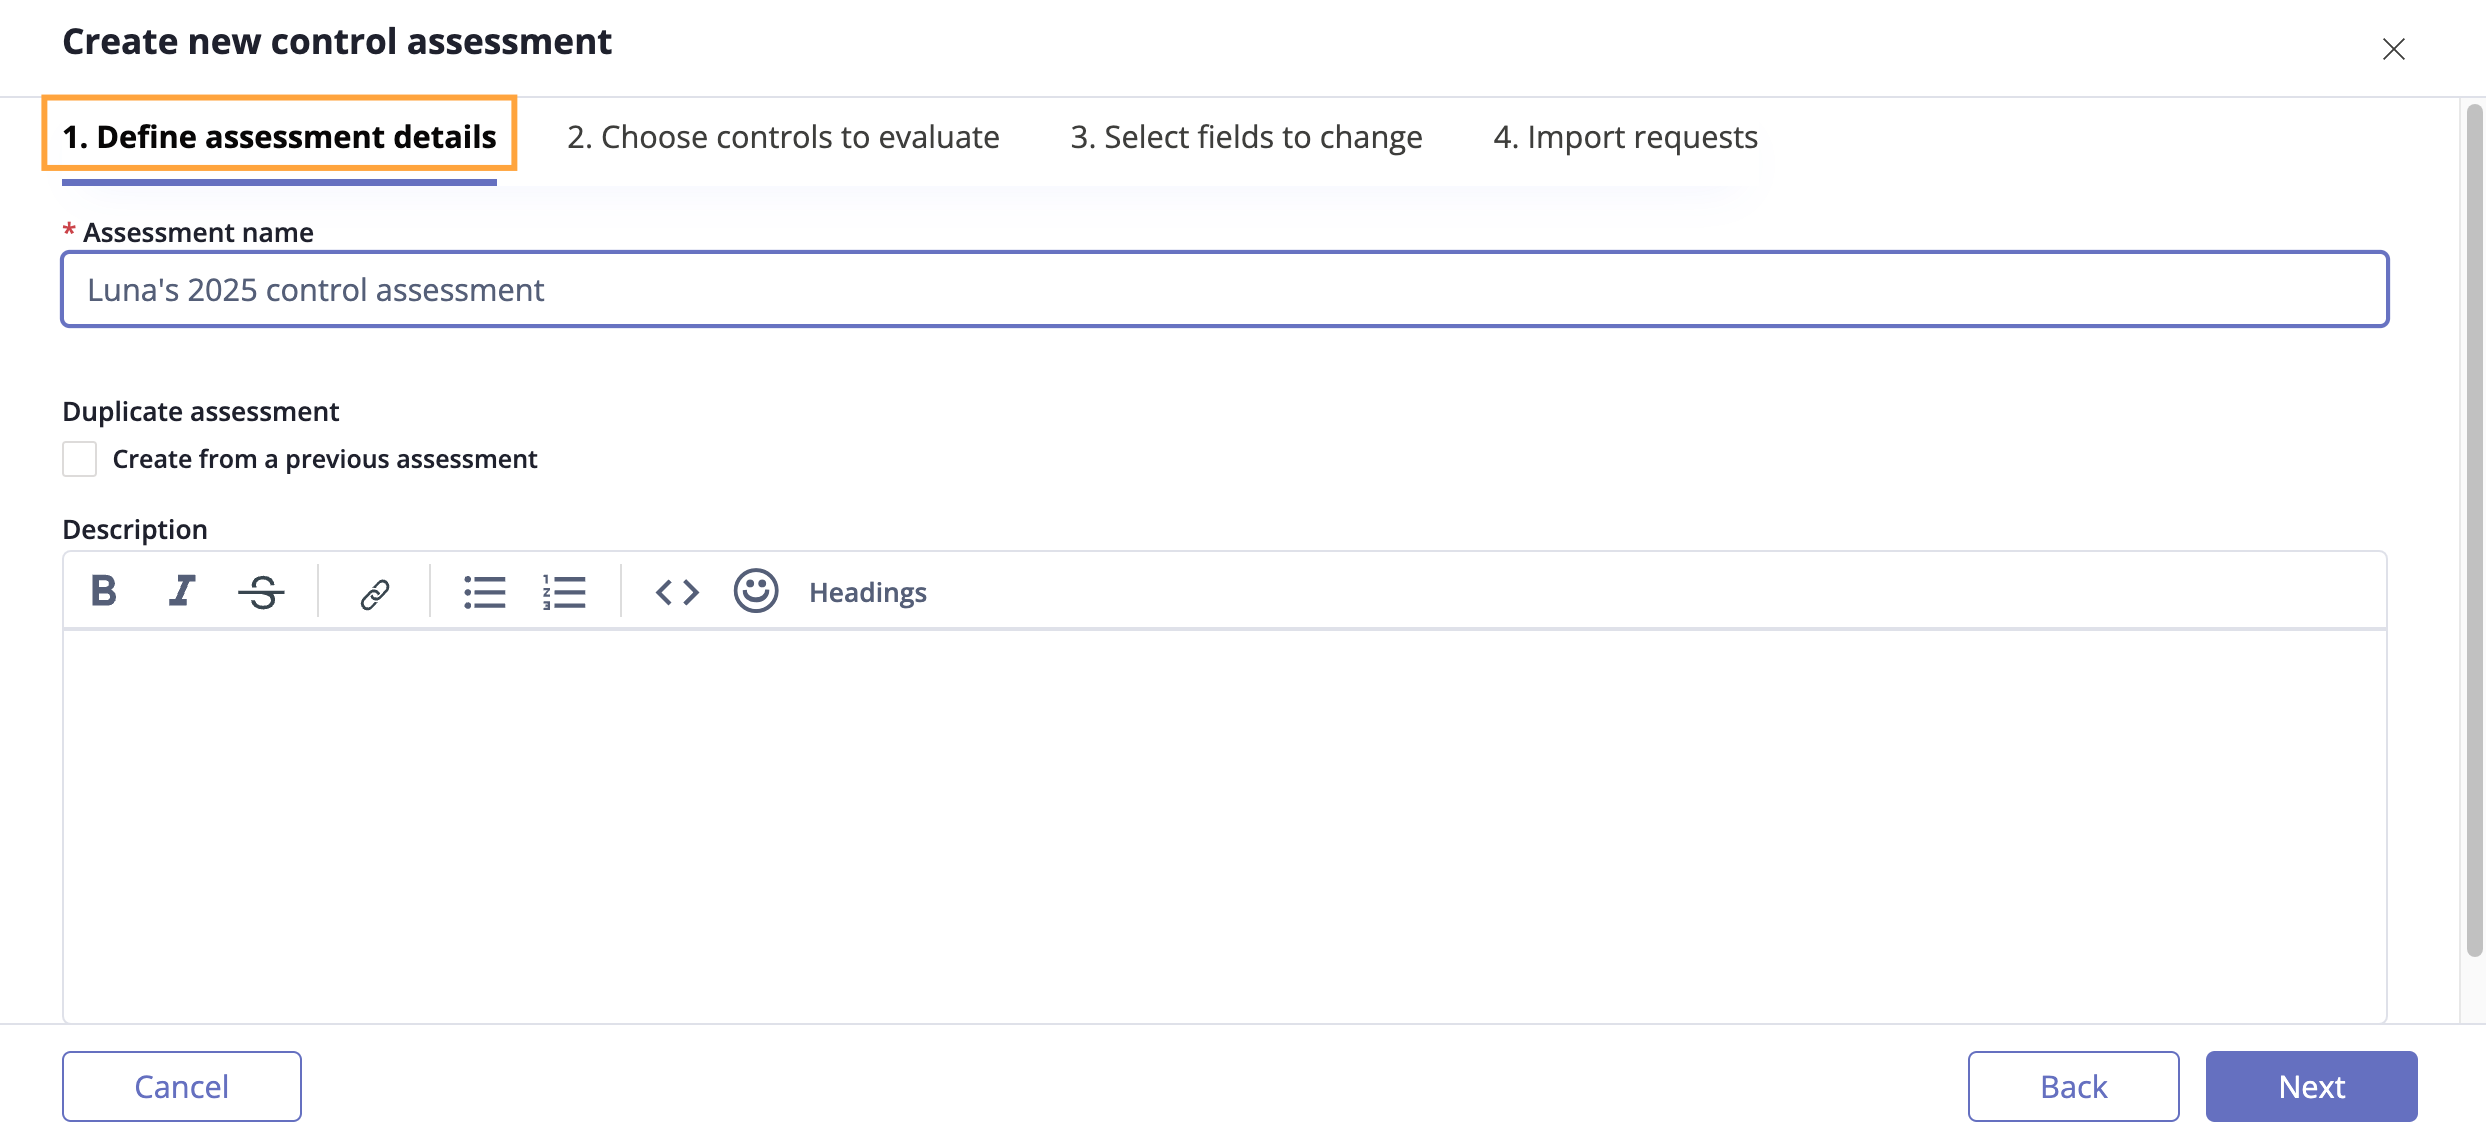
Click Next.
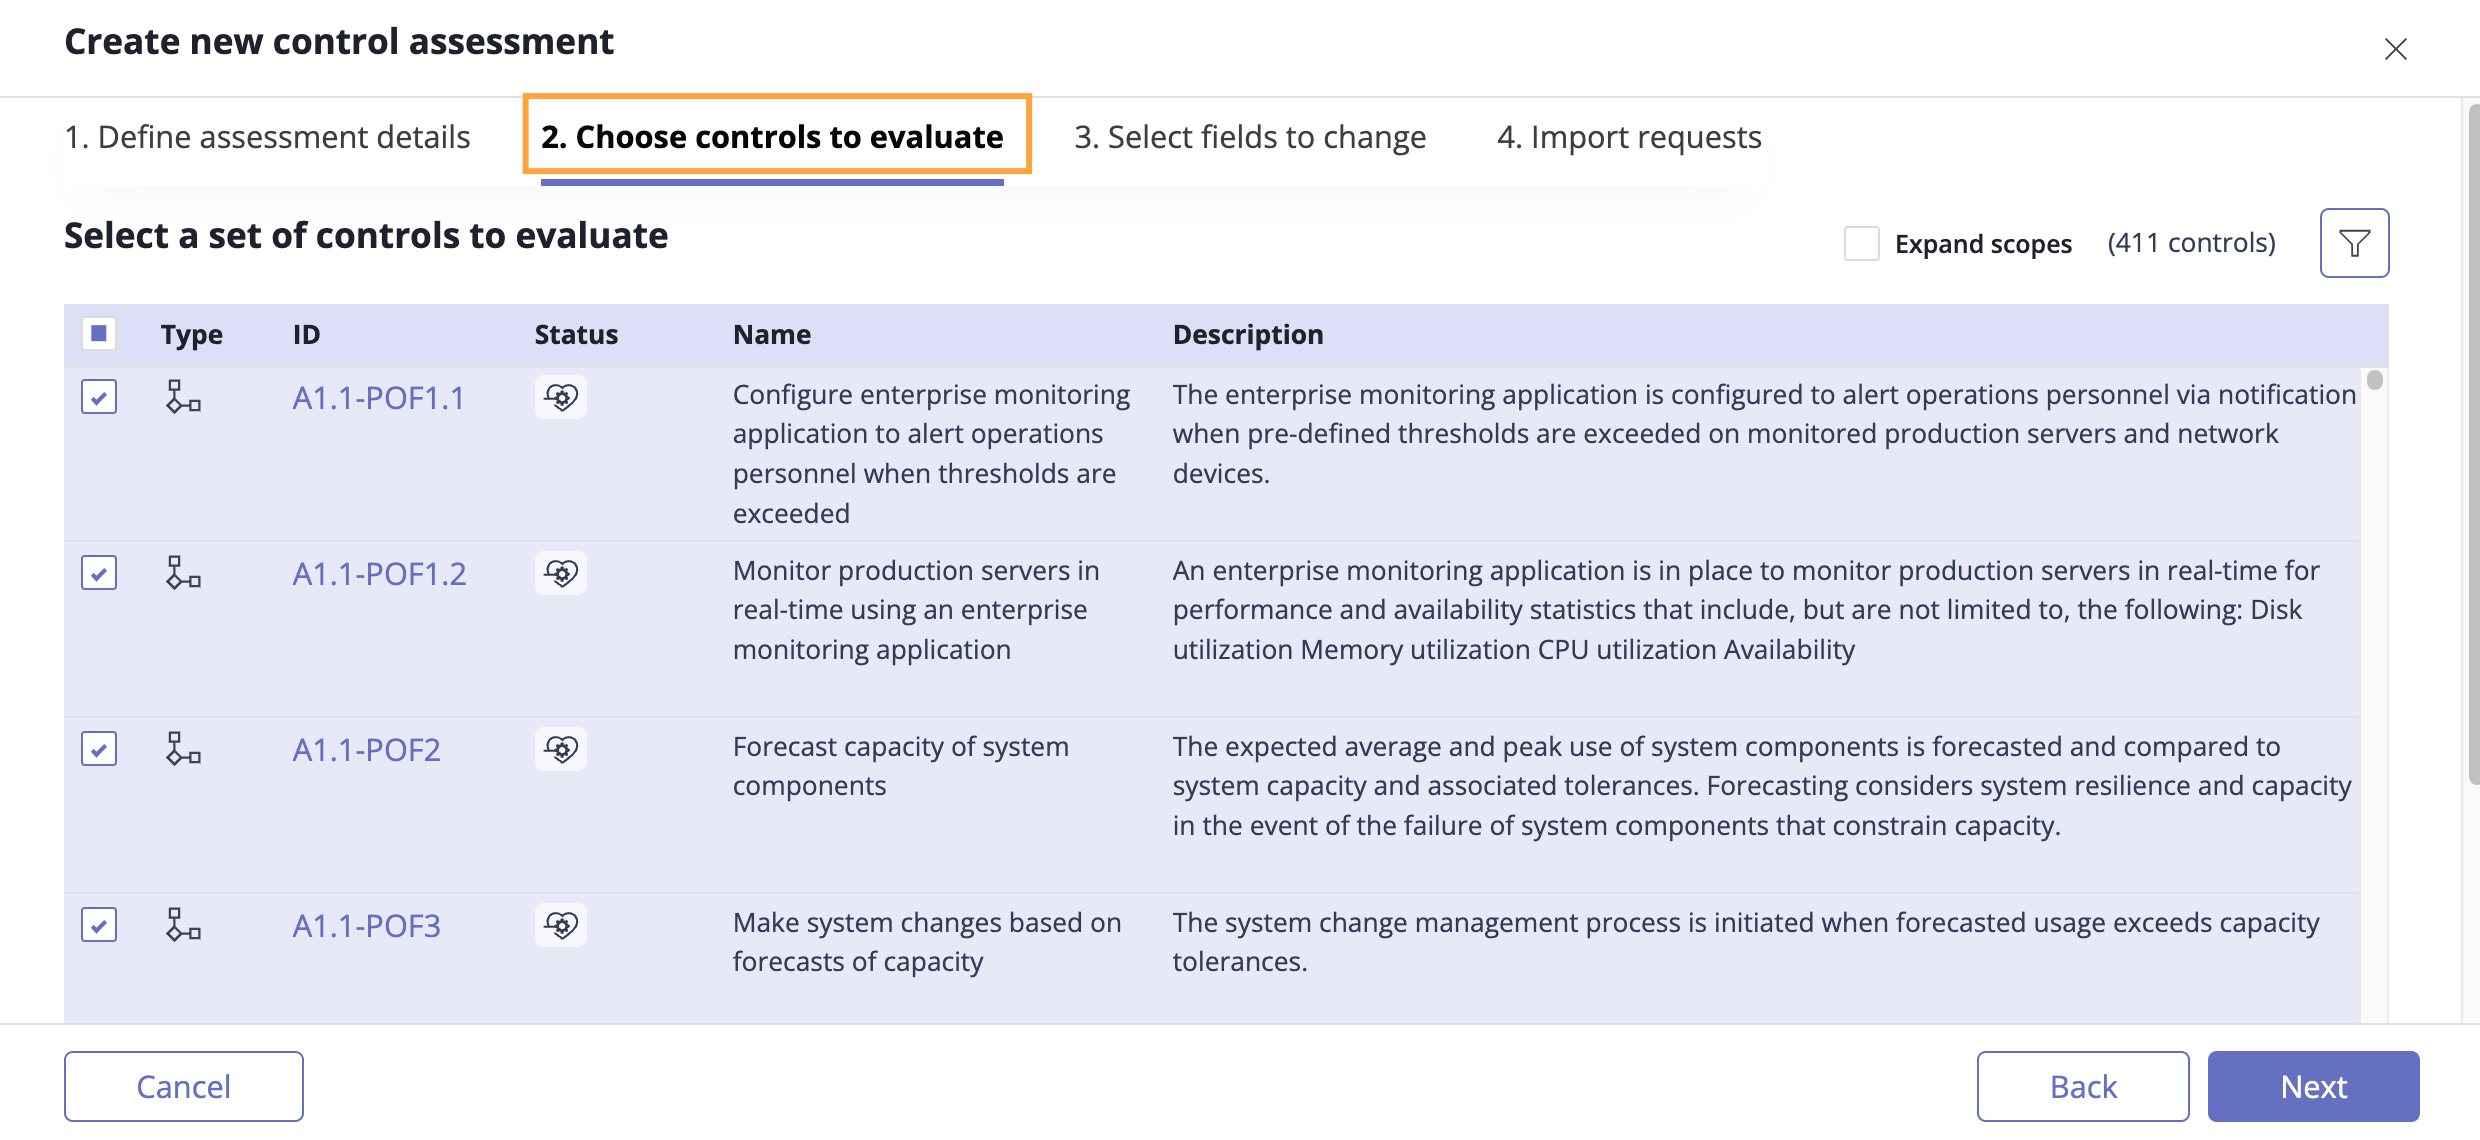
The Choose to evaluate tab displays.
From the Choose to evaluate tab, select the checkboxes next to the controls, requirements, or risks you want to assess. To narrow down search results, click the Filter icon in the upper-right corner. To select all controls, requirements, or risks, select the Select all checkbox in the upper-left corner.
Evaluation records created for the selected controls, requirements, or risks are assigned by default to the assessment creator.
Note
Only the controls, requirements, proposed risks, or risks you have access to are shown in this list. Selected controls, requirements, proposed risks, or risks are assigned to the assessment creator.
Tip
The ID column can be resized to allow you to view the full control, requirement, or risk ID.
Tip
To select a scope assignment control, select the Expand scopes checkbox.

Click Next.
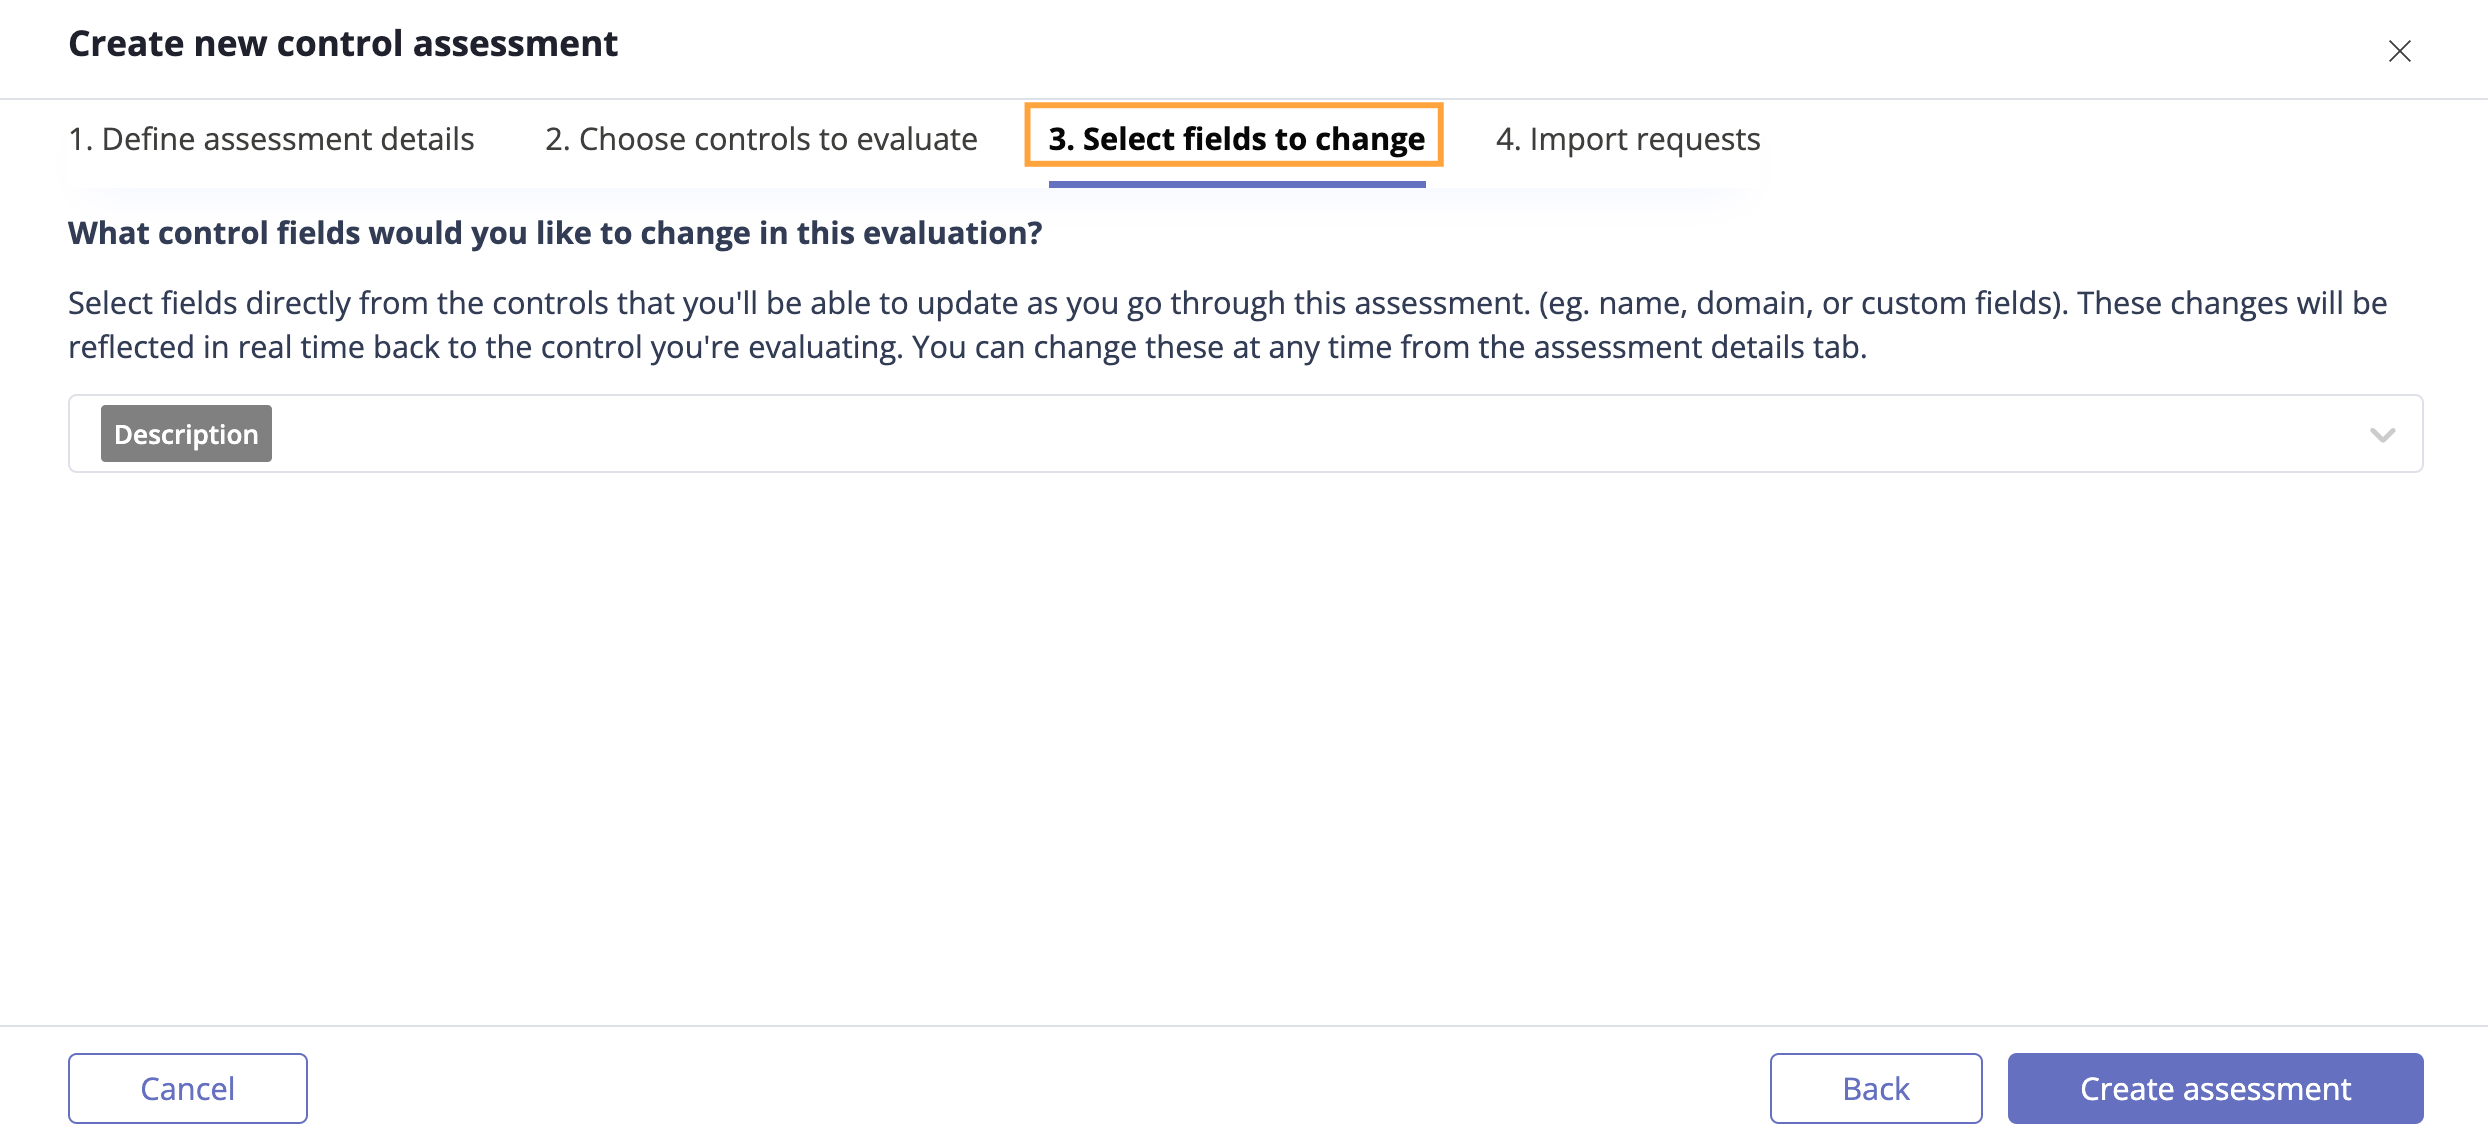
The Select fields to change tab displays.
Note
You can change the list of selected fields from the assessment Details tab.
From the Select fields to change tab, select one or more fields from the drop-down menu that you want to evaluate and update as you go through your assessment.
Note
If you select Linked Controls as a field when configuring a risk assessment, the mitigation fields for those controls can be evaluated, and additional controls can be linked on the Evaluation window.
Click Create assessment.
Do one of the following:
Click Skip to forgo importing requests into the assessment.
Click Download the example CSV to import a list of requests into the assessment. Refer to Importing requests for more information.
Click Go to assessment.
You’re taken to the assessment dashboard where you’ll find information applicable to the assessment, such as progress and timeline.
Assessments video
Watch this short video to learn more about assessments.