Creating an audit and importing a request list
Roles and permissions
The following roles can create an audit and/or import requests:
Administrators
Compliance managers
Users or Limited access users who are members of an audit can import requests
External auditors who are members of an audit can import requests
Before you get started with an audit, it’s recommended that you create a CSV containing your list of requests. For the CSV to be uploaded successfully, it must be formatted specifically for Hyperproof.
Before importing your request list, ensure that you have controls (with IDs matching the IDs in your CSV) and, if applicable, labels already created in Hyperproof.
Tip
For more information, see the following videos at the bottom of the page:
Step One: Downloading the example CSV
From the left menu, select Audits.
Click New.
The Create new audit window opens.
Enter a name for the audit and, optionally, a description.
Tip
You can create an audit by making a copy of a previous audit. For more information, see Copying an audit.
Click Create.
The Import requests window opens.
Click Download the example CSV.
Step Two: Editing the CSV
Replace the contents of the example CSV with your own requests. Be sure to follow the format of the example file, as well as the instructions on the page, to ensure that your requests can be successfully imported.
Note
The CSV must contain ALL headings listed below, even if they are optional. Keep in mind that headings are case-sensitive!
Heading | |
|---|---|
ID | Should contain an ID that's unique to your organization. Leave the field empty if this is a new request. This field is required. |
Reference | A field to store an auditor-provided request reference. This is an optional field. |
Summary | A field to concisely describe what work needs to be done to fulfill the request. This field is required. |
Assignee | Must be formatted as FirstName LastName (email address), i.e. Jennifer Cook (jcook@lunabtechnologies.org). This is an optional field. Tip: If no assignee is provided, the request is assigned to the individual who imports the CSV. Additional tip: The assignee's email address must match the email address they use to sign in to Hyperproof. |
Group | The group the request is assigned to. This is an optional field. Tip: The group must already exist in your organization. Additional tip: Ensure group names are spelled exactly as they are in Hyperproof. |
Status | A field for tracking the status of the issue. This is an optional field. Tip: Hyperproof recognizes the following request statuses: Not started, In progress, Internal review, Submitted to auditor, Needs revision, Closed, and Approved. |
Due date | The date the request needs to be completed. This is an optional field. NoteDates on imported records are parsed based on the date formats associated with your locale. If no valid date can be determined, Hyperproof displays an error. See Data interpreted by browser locale for a list of supported locales. |
Description | This is the full definition of the request. It can be a multi-line string. This is an optional field. |
Linked controls | A field for control IDs linked to the request, e.g. ETSI422-4.2.4. This is an optional field. Tip: If linking multiple controls IDs to a request, enter the control IDs in a comma-separated format, i.e. CC3.1.1, CC3.2.5, CC3.3.4. |
Linked labels | A field for labels linked to the request, e.g. Code of Ethics. This is an optional field. |
Linked programs | A field for programs linked to the request, e.g. Luna B.'s ETSI Program. This is an optional field. |
Linked audits | A field for audits linked to the request, e.g. Quarterly Audit 2023. This is an optional field. |
Linked registers | A field for registers linked to the request. Values are Risk and Vendor. This is an optional field. |
Linked risks | A field for risk IDs linked to the request, e.g. R-AC-2. This is an optional field. |
Linked vendors | A field for vendors linked to the request, e.g. Galactacore. This is an optional field. |
Linked evaluations | A field for evaluation IDs linked to the request, e.g. EVAL-1155. This is an optional field. Tip: If there is a linked evaluation column value and a matching evaluation, the evaluation's target object is linked to the request, and any proof linked to the request is linked to the evaluation. |
Evaluation references | A field for evaluation references linked to the request, e.g. monitoring-1. This is an optional field. 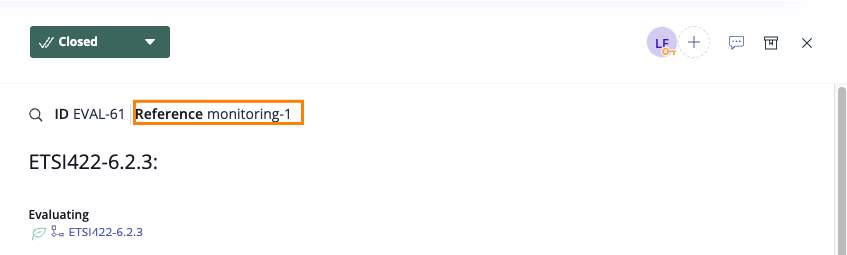 Tip: If the evaluation's reference field has ever been archived and later unarchived, Hyperproof adds |
Custom fields |
Below is a snippet of a sample import file.

Step Three: Importing the CSV
After you’ve made the necessary changes to the CSV, it can be imported into Hyperproof.
Drag and drop the CSV file into the Upload CSV File field, or click Select file to upload to upload it manually.
Click Import.
Hyperproof checks the CSV to ensure that there are no errors. You’ll be alerted if Hyperproof encounters any errors.
If Hyperproof didn’t detect any errors, click Next. If Hyperproof detected errors, do one or both of the following:
First, use the Error viewer to identify the errors. Second, correct the errors directly in the CSV. This ensures that the CSV is up-to-date should you need to re-import in the future.
Tip
Use the forward and backward arrows to cycle through the errors. The Error viewer gives specific information on what needs to be corrected.
Remove rows that contain errors by clicking Remove all rows with errors. Note that this doesn't remove any data in the actual CSV.
Click Next.
The CSV is imported.
A note about importing duplicate requests
If Hyperproof detects any duplicate requests, you have the following options:
Update links of existing requests - Includes any linked objects mapped to the request.
Update the existing requests with values from this import - Includes any updates that need to be made to the request, i.e. due date, status, description, etc.
Creating an audit video
Watch this video for a short overview of creating an audit.
Audit requests video
Watch this video for a short overview of working with audit requests.