Turning on freshness on a control or label
Roles and permissions
The following roles can turn on freshness on a control or label:
Anyone with manager permissions on the control or label
Tip
For more information, see the Control freshness video at the bottom of the page.
There are two steps to setting the freshness status on a control or label:
Turning on freshness and configuring the freshness schedule
Marking the control or label as fresh
Step One: Turning on freshness
You must first turn on freshness tracking for the control or label, then define its freshness policy.
From the left menu, select Controls or Labels.
Select the control or label for which you want to turn on freshness.
Do one of the following:
If you selected a control, select the ... (More options) tab, and then click Freshness settings.
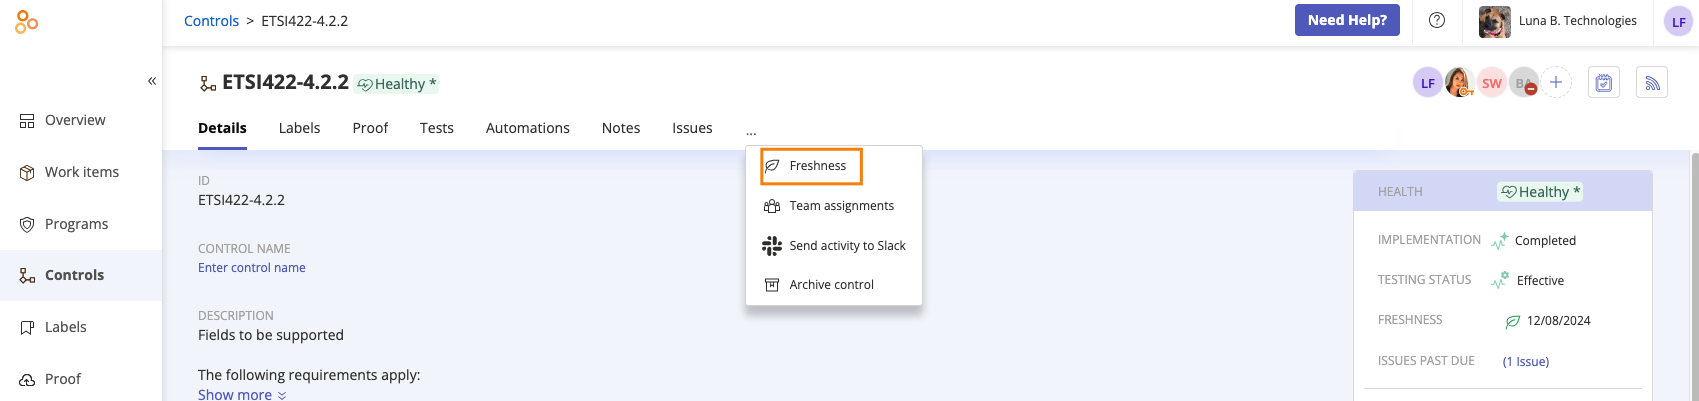
If you selected a label, click Freshness settings at the top of the window.
The Freshness window opens.
Toggle on the Enable Freshness setting.
In Current state, select the freshness status you want the object or objects to have when you save these settings.
If you selected Fresh as the Current state, in the Fresh as of field, select the date that the object or objects were first considered fresh.
Under Freshness Expires select one of the following options:
On a recurring schedule - Freshness expires based on a fixed schedule, such as monthly. This setting is independent of when the object was last marked fresh. See Understanding recurring schedules for more information.
After being marked fresh - Freshness expires a set number of days after the object is marked fresh. For example, if you mark an object as fresh on the 10th of the month and the number of days is set to 10, then freshness expires on the 20th of the month.
If you selected On a recurring schedule, enter the following information:
Note
If you choose a day that would be invalid, such as the 31st of every month, Hyperproof defaults to the last valid day of the month for months that don't have 31 days. For example, February's schedule would run on February 28th.
Effective date - Enter the date you want the schedule to start. If the Effective date is today and the selected Recurring schedule (Day of Week, Month, or Year) also falls on today, the first expiration date is set to today.
Expires every - Enter the unit of measure and the number of occurrences, such as every 1 Month or every 2 weeks.
Note
When you configure the recurring schedule, the date the next action is scheduled to take place displays below the schedule. If it is not the date you want, adjust the schedule until you get the date you need.
Options include:
Day
Week - You can select which day of the week the schedule should run. If you don't select a day, Hyperproof defaults to the day of the week of the Effective date.
Month - You can select a specific day of the month, such as Day 15, the occurrence of a weekday, such as the third Monday, the last day of the month, or the last weekday of the month.
Year - You can select a specific day of the year by month and date, the occurrence of a weekday within a specific month, such as the third Monday of December, the last day of the month, or the last weekday of the month.
If you selected After being marked fresh, below When marked fresh, the proof expires in..., set the expiration period. Hyperproof uses the Fresh as of date, along with the expiration period, to determine the expiration date. The expiration date is displayed below the schedule.
Click Next.
A confirmation message displays. if you don't have manager permissions for some of the objects, Hyperproof warns you that it can't update those objects.
Click Confirm.
Now that freshness has been set:
The freshness status is displayed next to the name of the control or label.
Various dashboards and item lists throughout the app now reflect the freshness status of the control or label.
Step Two: Marking the control or label as fresh
The second part of setting the freshness status is to mark the control or label as fresh. When you set the status of a control or label as fresh, it remains in that state until the end of the set expiration period.
At the end of the set expiration period, you can reset the control or label as fresh as follows:
Marking the control fresh from the Details tab
From the left menu, select Controls.
Select the control you want to mark as fresh.
Select the Details tab, then click the freshness status in the Health panel or next to the control name at the top of the window.
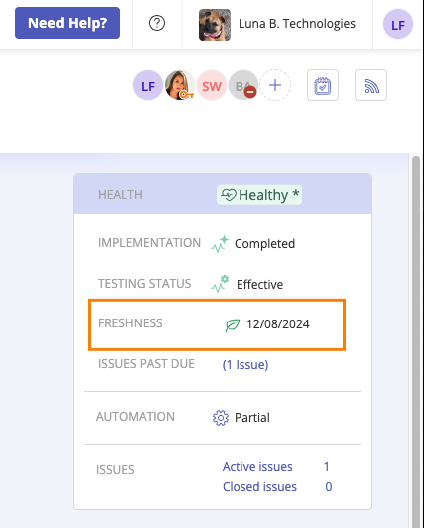
The Mark fresh window opens.
The Freshness field defaults to Fresh.
The Fresh as of field defaults to today's date. You can backdate it if necessary, but you can't choose a future date.
Hyperproof displays the next expiration date on the window.
Click Save.
The control is marked fresh.
Marking the label fresh
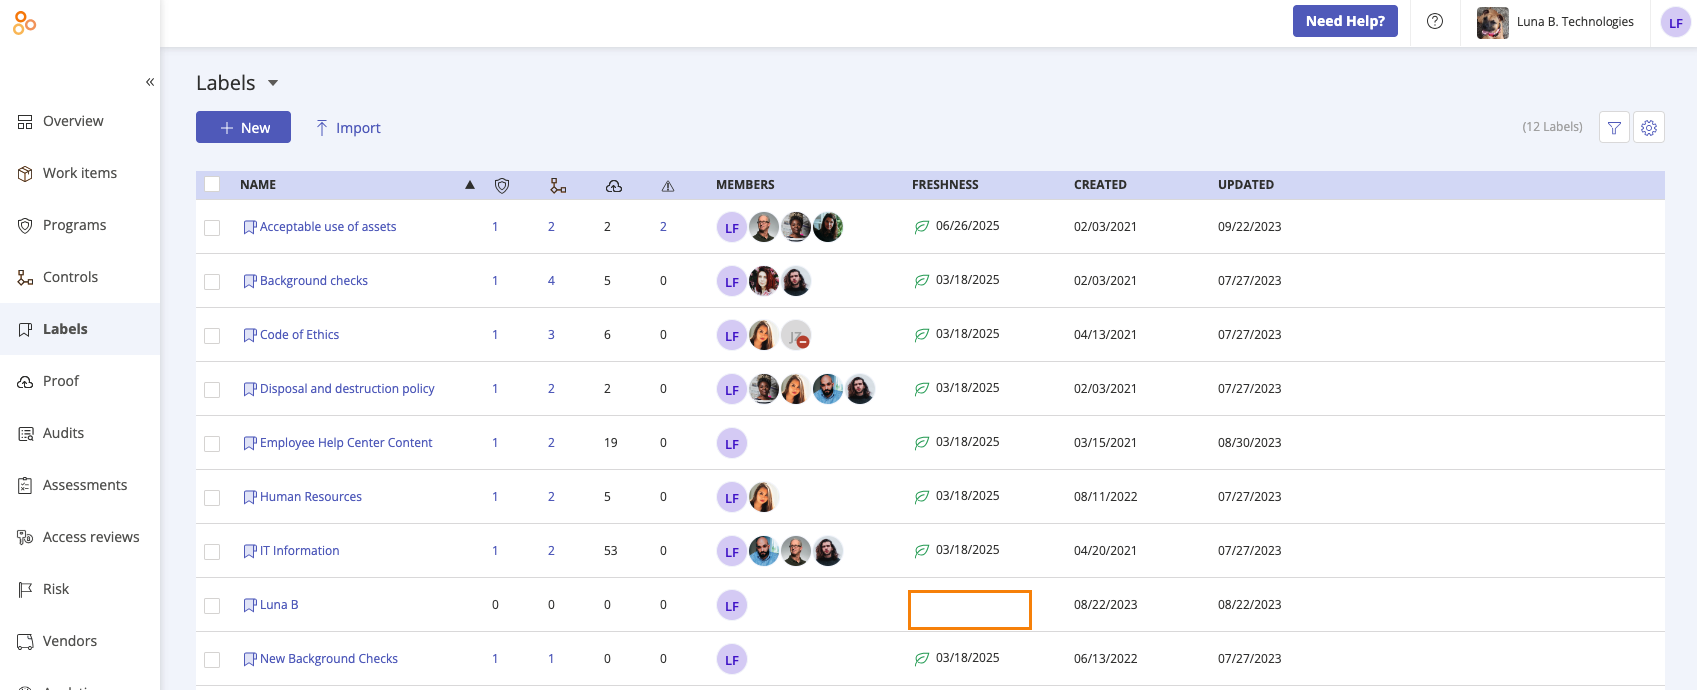
From the left menu, select Labels.
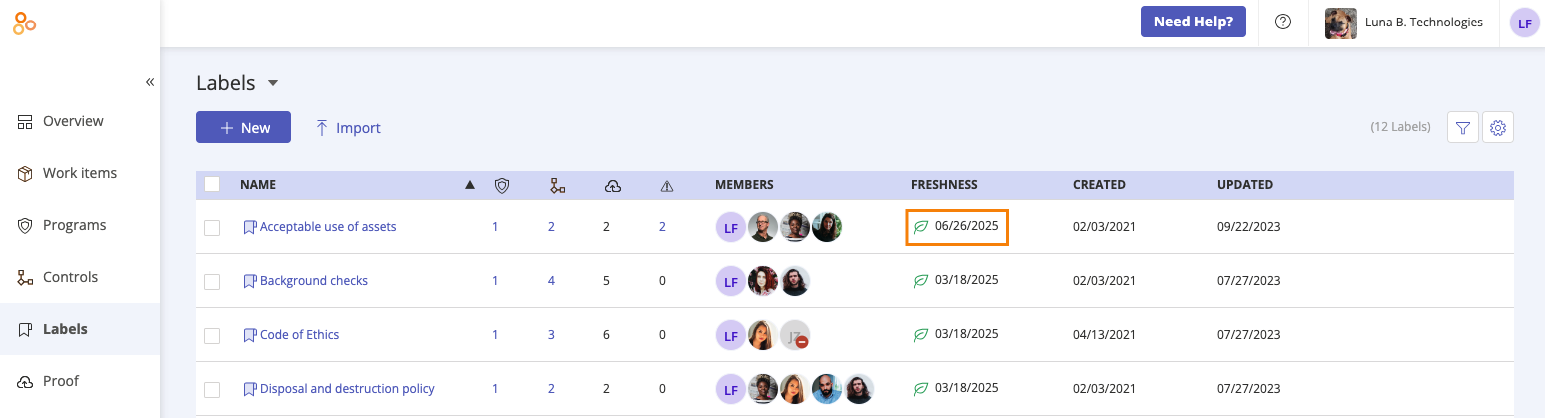
Locate the label you want to mark as fresh.
Click the date or freshness status below the Freshness column.
The Mark fresh window displays.
The Freshness field defaults to Fresh.
The Fresh as of field defaults to today's date. You can backdate it if necessary, but you can't choose a future date.
Hyperproof displays the next expiration date on the window.
Click Save.
The label is marked fresh.
A note about freshness on archived controls
A note about freshness on scope assignment controls
Control freshness
Watch this short video to learn more about control freshness.