Refreshing an application user list from a CSV file
Roles and permissions
The following roles can update an application user list for an access review:
Anyone with manager permissions for the access review
To refresh an application user list for an access review using a CSV file, create an updated CSV file and import it into the application entry you want to update.
You should only modify your user lists when the access review status is In setup. You can change the access review status back to Setup if necessary on the access review Details tab. See Setting access review status for more information.
Warning
Re-importing an application user list deletes the existing list and any associated review work that may have already been done.
Note
If you created the application user list using a Hypersync, you can't refresh the list by importing a CSV file. You can either delete the application user list and create a new one from a CSV file or sync the Hypersync. For more information on syncing, see Refreshing an application user list using a Hypersync.
CSV requirements
The table below provides guidelines on the fields and format required to import your application user list inCSV format.
Importing the CSV file
From the left menu, select Access reviews.
Select the access review you are setting up.
Select the Setup tab.
Under Applications to review, click the name of the application you want to refresh.
The Details tab for the application displays.
Click the Records tab.
Click the Import link.
A warning displays indicating that all records will be deleted. Note that deleting the records also deletes changes you have made to the default reviewer and sysadmin for a user and any review information you have added.
Warning
All records in this application will be deleted and replaced with new records.
Review the warning message and click the Confirm button to continue.
The import screen displays.
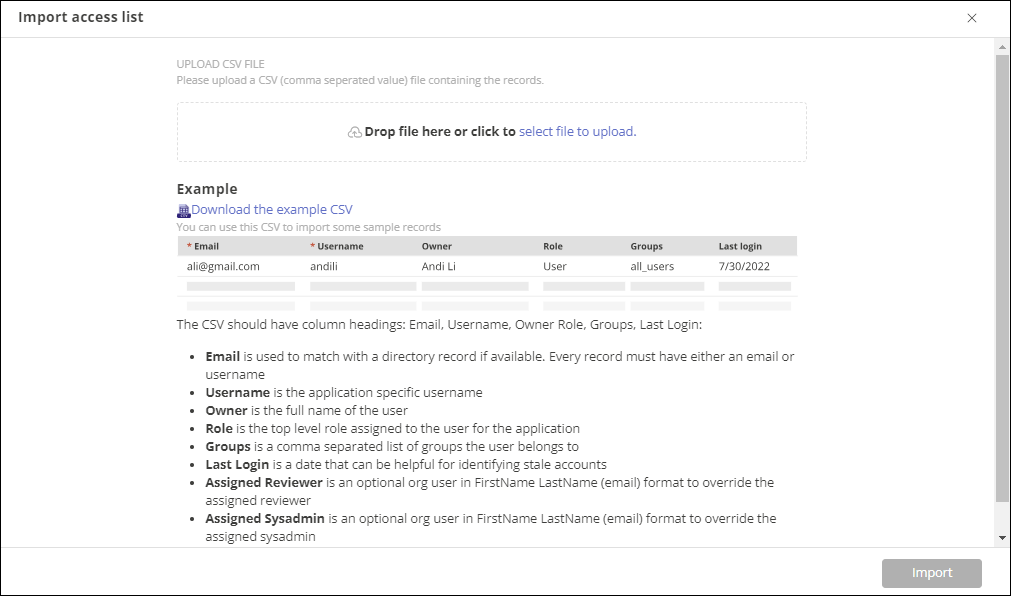
Drag-and-drop the CSV file into the Upload CSV File field, or click Select file to upload to browse to the location of the CSV file you want to import.
Click Import.
Hyperproof checks the format within the CSV file to ensure that there are no errors. If any errors are found, Hyperproof displays an error message
If Hyperproof didn't detect any errors, click Next. If there are errors, do the following:
Resolve the errors by double-clicking the cell with the highlighted error and correcting the value.
Remove rows that contain errors by clicking Remove all rows with errors.
Click Next.
The CSV file is imported.