Connecting Hyperproof to Jira Server
Roles and permissions
Only administrators can configure Jira Server for their organization
After configuring Jira Server, it’s highly recommended that you link a Hyperproof task to a new or current Jira issue to ensure that the bi-directional sync, as well as user permissions, works as expected.
Note
Hyperproof only supports certain types of Jira custom fields. See Supported Jira custom fields.
Note
If your Jira deployment changes from Jira Server or Jira Data Center to Jira Cloud, the integration stops working and all of your integrated tasks will need to be set up again, manually.
If you haven't yet reviewed the minimum permissions needed, refer to Jira Server permissions.
Jira Server and rate limiting
If rate limiting is enabled in your Jira Server environment, a best practice is to configure it for at least 600 calls per hour or 10 calls per minute to prevent any rate-limiting errors that might be triggered by the nightly task integration sync with Hyperproof. Hyperproof syncs tasks continuously, but uses the nightly task integration sync to ensure that no data has been missed. This sync may involve a large number of records, depending on the volume of tasks created or edited throughout the day.
If your Jira environment supports high burst limits or exceptions for the time window of the nightly sync with Hyperproof, the rate could be set much lower. Note that large enterprises may need to double or triple the rate limit to avoid disruptions.
Using an admin account versus a user account
Use admin account credentials when setting up the Jira integration. These credentials are saved in Hyperproof and used to set up the integration and provide information for certain fields in the task window.
The Hyperproof user who's logged in and initially configures the admin user account for the integration is the sole owner of the credential settings. Other Hyperproof users are not able to update the admin credentials. They can, however, click the Trash icon which allows them to delete and reset the saved admin credentials. It's highly recommended not to do this as all existing task integrations will be deleted!
Any Hyperproof user who wants to use the task integration must go to the task window and set up a task to integrate with Jira. The first time they do this, they'll be prompted to log in to Jira. This is where they should use their own Jira login credentials, not the admin credentials.
User login credentials are saved in the back-end with the logged-in Hyperproof user. The recommended workflow is for each Hyperproof user who will be integrating tasks with Jira to enter their user credentials in the task window as described above.
If a Hyperproof user needs to update their Jira credentials, they should go to Hyperproof Settings > Connected accounts. They should then locate the Jira task integration credentials card and disconnect. After they've disconnected, they can go back to the task window, initiate a Jira interaction, and re-enter their user credentials.
Connecting Hyperproof to Jira Server
Note that only administrators can configure the Hypersync for Jira Server.
From the left menu, select Settings.
Select Integrations.
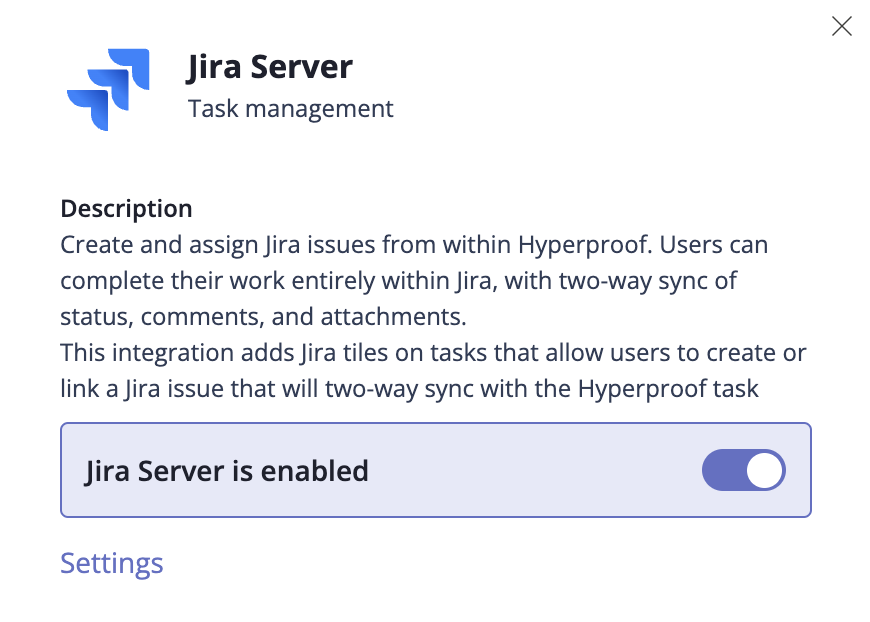
Below Enabled, select Jira Server.
The Jira window opens.
Click Settings.
Enter your organization's Jira URL, then click Submit.
Tip
Be sure to include the scheme, e.g.
https://.The Create connection window opens.
Enter your Jira username and password, and then click Submit. Note that if a user fails to log in successfully after five tries, they’ll need to solve a CAPTCHA.
The Jira settings window opens.
Click Configure settings.
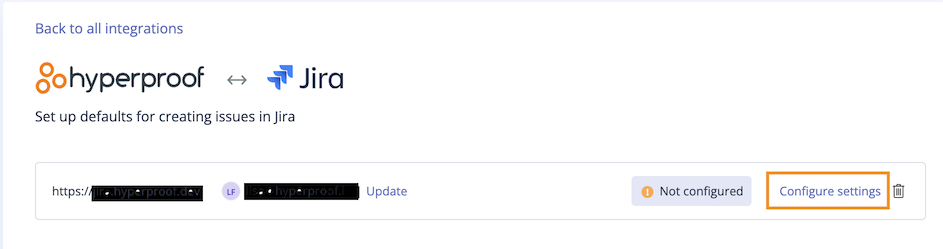
The Jira settings window opens.
Select the checkbox next to the Jira project or projects you want to connect, then click Next. Note that if you select more than one Jira project, you’ll need to map statuses for each project.
From the drop-down menu, select a default issue type, then click Next. Note that you can change the issue type when creating a new ticket.
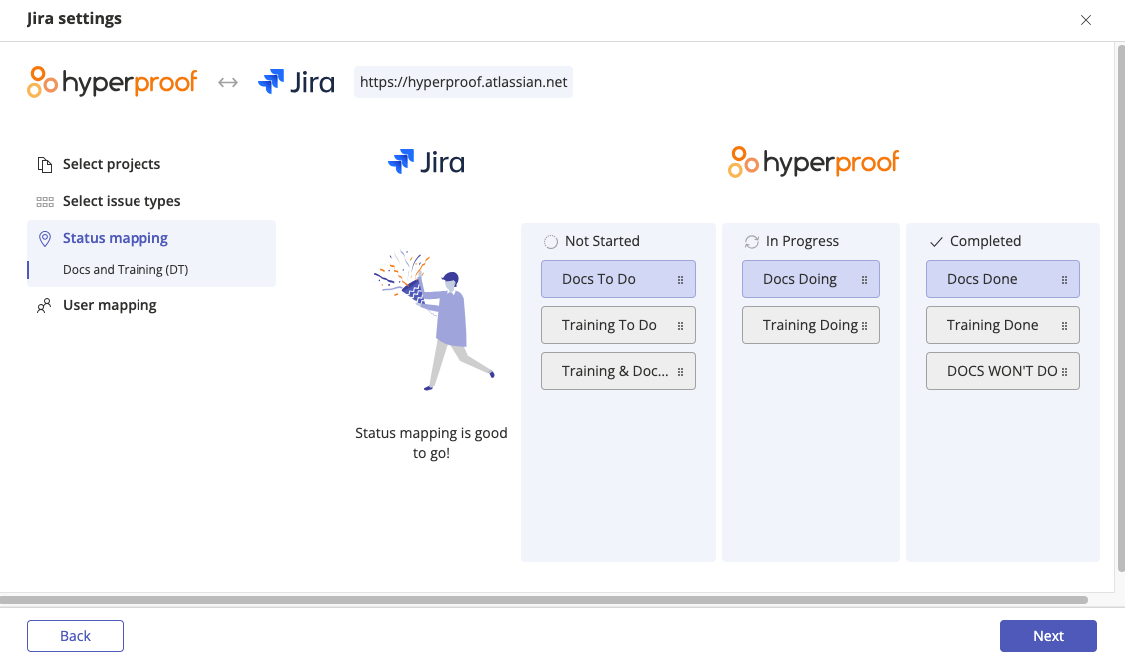
Map a Jira status (e.g. To Do) to a Hyperproof status (e.g. Not Started) by dragging the Jira status to the Hyperproof status. Refer to the screenshot below for the recommended workflow.
Note
At this time, Hyperproof does not support complete Jira state transitions. For more information about status mapping, refer to Jira status mapping.
Note
If you selected more than one Jira project, you’ll need to map statuses for each project.
Click Next.
Jira Server does not require status mapping of users.
Click Save to finish the configuration process. Jira users not in Hyperproof will be added as contacts in Hyperproof based on their email address. Hyperproof users not in Jira will not be mapped to anything.
Jira is now configured. Should you need to change any settings, such as default story type or mapping status, refer to Editing Jira settings.