Creating a Jira issue via Hyperproof
Roles and permissions
The following roles can create a Jira issue via Hyperproof:
Anyone with manager or contributor permissions on the task
Note
To use Jira with Hyperproof, your Hyperproof administrator must first configure the integration. See Connecting Hyperproof to Jira Cloudand Connecting Hyperproof to Jira Server
Create a new task. If you are unsure of how to create a task, refer to Creating a task. Note that Hyperproof task titles have a 250-character limit.
If this is your first time using the Jira integration, follow the steps below. If you’ve already signed in to Jira in Hyperproof, skip to step 3.
In the right pane of the task, click the Jira integration icon.
The Authorize app window opens.
Click Accept.
The Authorize Hyperproof window opens.
Click Allow.
Click the Jira integration icon, then select Create a new issue from this task.
Select your options from the drop-down menus. Note that menus with asterisks (*) are required fields.
Data synced between Hyperproof and Jira is dependent on the Jira project. When creating or syncing issues, the integration fetches the available fields for the specific project and issue type using the Jira API. This ensures that only the fields relevant to the selected Jira project and issue type are presented and processed. The available fields (including custom fields) can vary between projects due to Jira's project-level configuration.
Click Create.
Troubleshooting
Time out error
If you receive a time out error while attempting to create a Jira issue in Hyperproof, it’s more than likely due to your Hyperproof connection remaining open for an extended period of time. To resolve this issue, follow the steps below.
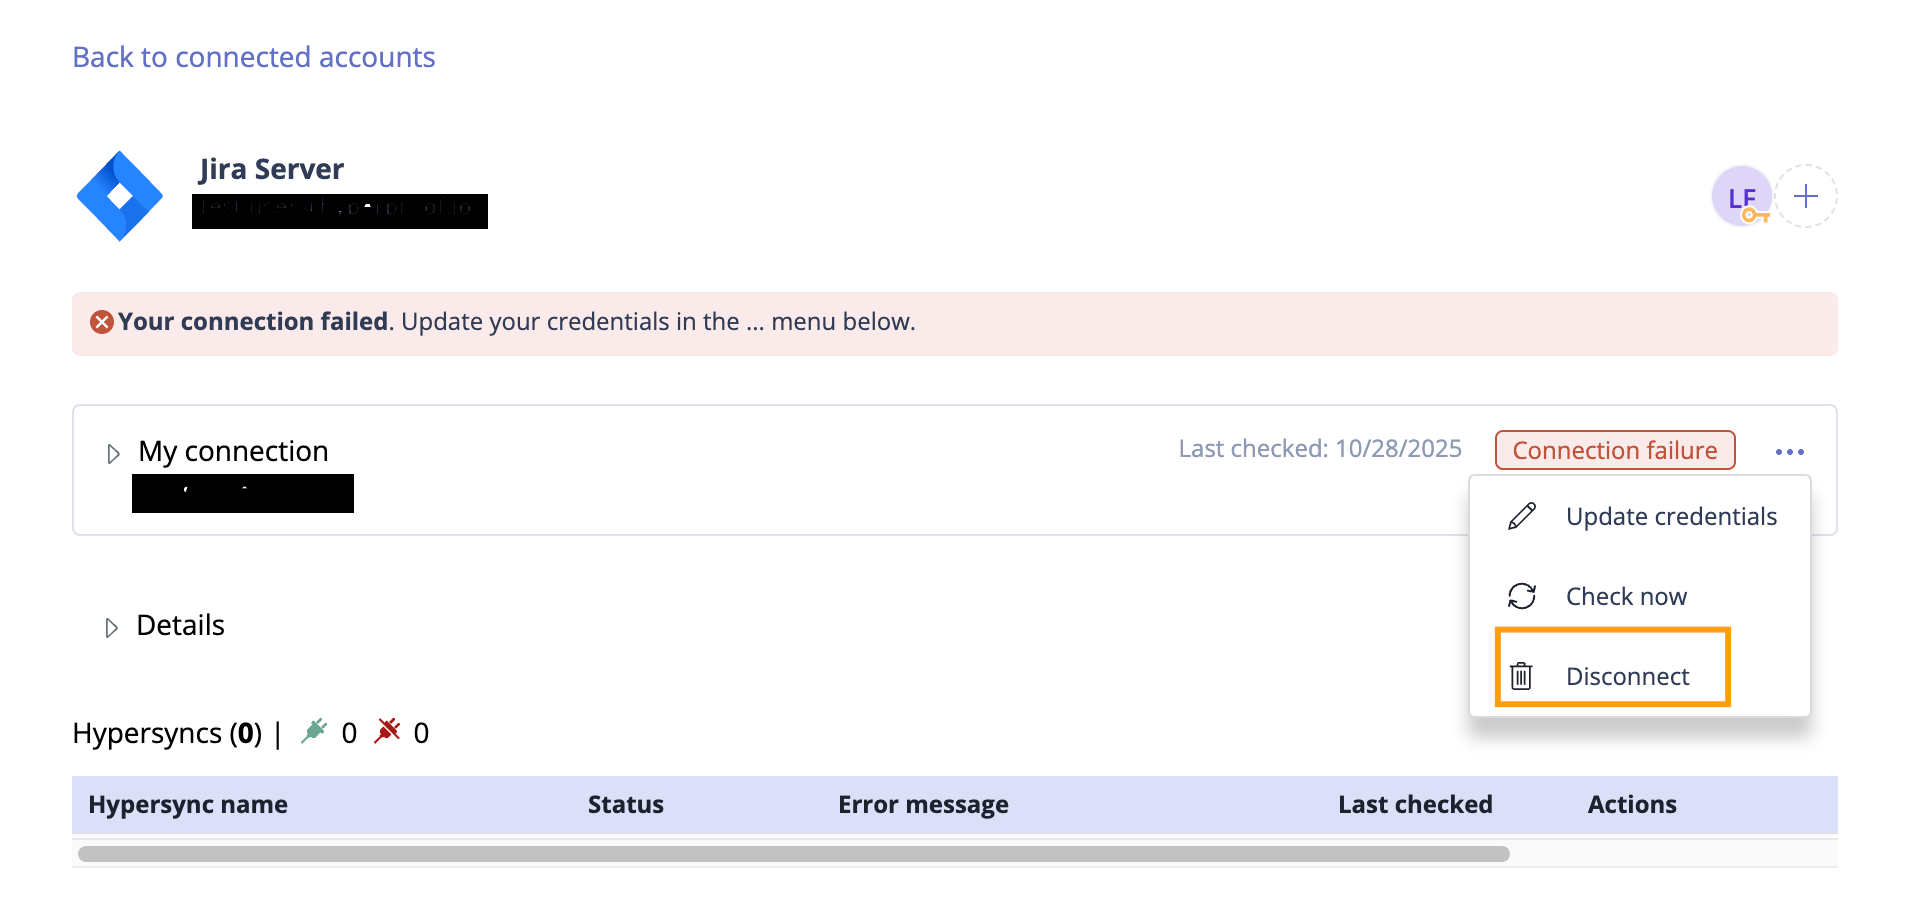
From the left menu, select Settings.
Select Connected accounts.
From the list of connections, select your Jira connection.
Click the ... (More options) icon, then select Disconnect.
Navigate back to the task, then click the Jira integration icon.
Select Create a new issue from this task. Follow steps 4 and 5 in the previous section.