Importing best practices
The following objects can be imported into Hyperproof:
Keep in mind the best practices listed below to ensure a successful import.
Note
Additional information on importing objects into Hyperproof can be found by clicking an object above.
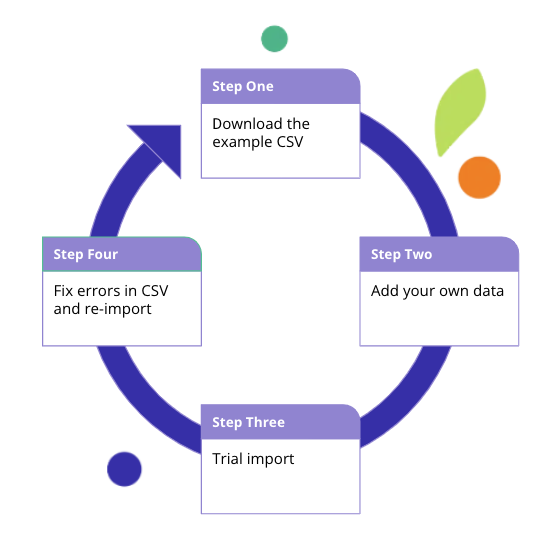
Use the example CSV.
Hyperproof provides example CSVs for all importable objects. It's recommended to download the CSV and replace the example information with your own data. Example CSVs can be found in an object's import window.
It's not recommended to use the CSV that's generated when you export an object from Hyperproof.
Ensure your CSV is properly formatted.
Include each heading in your CSV even if it's an optional heading with no data. Keep the same heading order as in the example CSV.
Make sure spelling and capitalization in your CSV matches what's in Hyperproof, e.g. 'Risk' vs 'Risks', 'control' vs 'Control', 'complience' vs 'compliance', etc. Tip: Check your CSV with a text editor to make sure there are no spelling errors.
Hyperproof interprets dates based on your browser's locale. For example, if the locale is set to English (United States), 01/05/2023 will be interpreted as January 5, 2023. If the locale is set to German, 01/05/2023 will be interpreted as May 1, 2023. See Data interpreted by browser locale for a list of supported locales.
Use commas for multi-select fields, e.g. A,B,C,D (no spaces between values).
If working with Unicode, it's recommended to use UTF-8.
If you have an answer that has commas within it, add a backslash ( \ ) before the comma. For example, Red,Blue,Green\,Purple\,Orange,Yellow shows up as:
Red
Blue
Green, Purple, Orange
Yellow
If importing custom fields, they must already exist in your Hyperproof organization.
If a custom field in your CSV doesn't already exist in Hyperproof, add it in Hyperproof before import.
Add any missing values to your custom field pick list before importing your CSV. For example, if a custom field's values are Yes, No, Maybe, and 'Maybe' isn't already a value in Hyperproof, it'll need to be added to Hyperproof before import.
Ensure custom field names are spelled exactly as they are in Hyperproof. For example, if a custom field is called Security (with a capital 'S'), the CSV heading needs to also have a capital 'S'. If a custom field is called Risks, and the CSV heading is Risk, the custom field will not be imported.
Owners and assignees must already exist in your Hyperproof organization.
Before import, ensure that any owners and/or assignees are members of your Hyperproof organization. If they're not a member, they need to be added via Settings > People. See Adding users to your organization for more information.
The proper format for assigning an object to an owner is: FirstName LastName (email address), i.e. Jennifer Cook (jcook@lunabtechnologies.com).
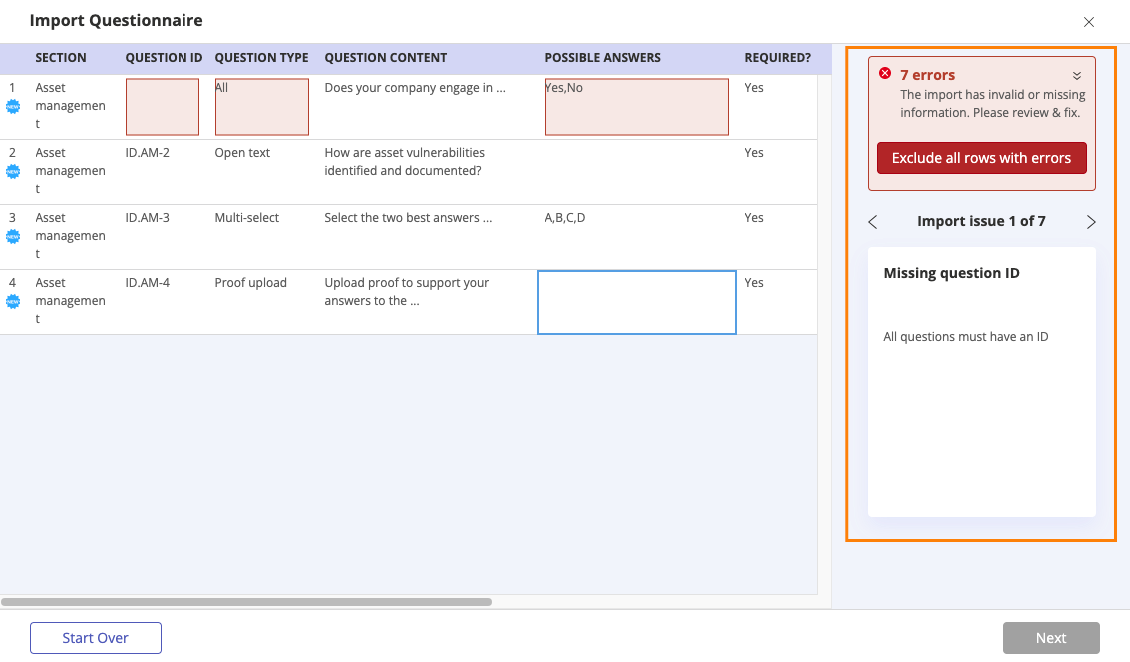
Use the Error viewer to identify mistakes.
Hyperproof has a built-in error viewer that provides specific information for fixing errors. Use the forward and backward icons to determine what needs to be fixed. Tip: It's recommended to fix errors in the CSV rather than in the Error viewer.
Fix errors in your CSV and then re-import.
While some errors can be fixed directly in the Error viewer, it's recommended to fix them in your CSV and then re-import. This ensures that the data in your CSV is error-free should you need to import the CSV in the future.