Connecting to your Snowflake data warehouse
Roles and permissions
The following roles can configure the Snowflake data warehouse:
Administrators
To begin using Self-service reporting set up a Snowflake service account and password for your organization. This setup process is done from within Hyperproof. The setup process creates your data warehouse on Hyperproof's Snowflake server and begins collecting Hyperproof data.
Once the initial setup is complete, you can add more users to your data warehouse as needed, delete users, or reset passwords. See Managing self-service reporting users.
Caution
The data warehouse contains all data from Hyperproof. You may need to filter the data to limit visibility for certain audiences.
Enabling Multi-factor authentication for Person accounts
Enabling Multi-factor Authentication (MFA) for Snowflake Person accounts is required as an additional security measure. Enabling MFA in Snowflake requires Cisco Duo.
Log in to your Hyperproof Snowflake instance.
Click the profile circle and select My Profile.
When the profile window displays, follow the steps in the MFA enrollment section to enroll in Duo MFA.
See Multi-factor authentication (MFA) in the Snowflake documentation for more information.
Using RSA key-pair authentication for Service accounts
RSA key-pair authentication is required for Snowflake Service accounts.
Note
Generating RSA keys requires OpenSSL. Consult with your IT team to assist you with RSA key generation.
Open a terminal window.
Generate a private key with the following command:
openssl genrsa 2048 | openssl pkcs8 -topk8 -inform PEM -out rsa_key.p8 -nocryptGenerate a public key for your private key:
openssl rsa -in rsa_key.p8 -pubout -out rsa_key.pubStore the private key in a secure location.
For detailed instructions on configuring key-pair authentication and generating a public key, see Key-pair authentication in the Snowflake help.
Configuring the connection to your Snowflake data warehouse
From the left menu, select Settings.
From the Settings menu, select Self-service reporting.
Click the New button to add a service account and password for your data warehouse.
In the Username field, enter the new user name for the data warehouse.
Note
Snowflake user names must be unique across all Hyperproof organizations. For example, if you have a sandbox Hyperproof organization and a production Hyperproof organization you can't use the same user name for both Snowflake data warehouse connections.
You will see a warning message that the username or password is already in use if you enter a username that is already in use in any Hyperproof organization.
Under Type, select one of the following account types:
Person - Requires MFA and is intended for individual use. Typically, this account type is used to log in to Snowflake manually to run queries.
Service - Requires RSA key-pair authentication and is intended for use with automated tools, such as an application used to generate a report at regular intervals. See Key-pair authentication in the Snowflake help.
Note
Keys generated using ssh-keygen are not supported. You must use OpenSSL.
If you chose a Person account, in the Password field, create a password for the data warehouse.
Passwords must be at least 8 characters and contain at least 3 of the following 4 types of characters:
lowercase letters (a-z)
uppercase letters (A-Z)
numbers (0-9)
special characters, such as !@#$%^&*
If you chose a Service account, in the Public Key field, enter the RSA key generated for the service account. See Key-pair authentication in the Snowflake help.
Click Create.
The Create Snowflake account window indicates that your data warehouse is being created. The connection information displays in the window. Use this information to connect to your data warehouse.
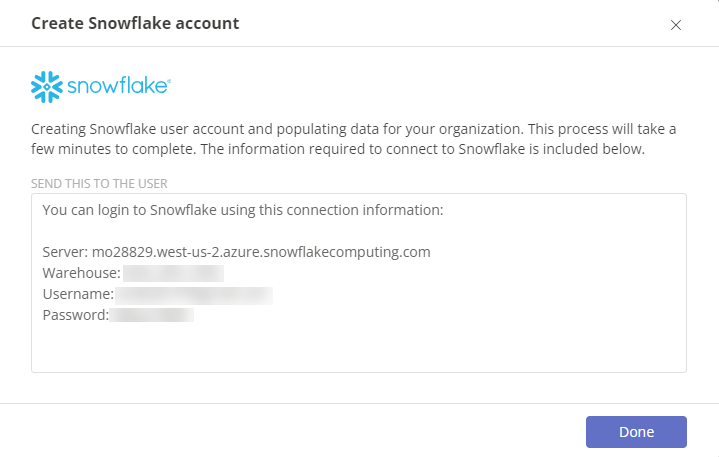
Copy the connection information and click Done.
Once the data warehouse has been created and populated with data from your Hyperproof organization, you can access the data using Snowsight or another Snowflake supported BI application. For more information, see Using Snowsight.