Connecting Hyperproof to Jira Cloud
Roles and permissions
Only administrators can configure Jira Cloud for their organization
Note
Hyperproof only supports certain types of Jira custom fields. See Supported Jira custom fields.
Note
If your Jira deployment changes from Jira Server or Jira Data Center to Jira Cloud, the integration stops working and all of your integrated tasks will need to be set up again, manually.
If you haven't yet reviewed the minimum permissions needed, refer to Jira Cloud permissions.
Using an admin account versus a user account
Use admin account credentials when setting up the Jira integration. These credentials are saved in Hyperproof and used to set up the integration and provide information for certain fields in the task window.
The Hyperproof user who's logged in and initially configures the admin user account for the integration is the sole owner of the credential settings. Other Hyperproof users are not able to update the admin credentials. They can, however, click the Trash icon which allows them to delete and reset the saved admin credentials. It's highly recommended not to do this as all existing task integrations will be deleted!
Any Hyperproof user who wants to use the task integration must go to the task window and set up a task to integrate with Jira. The first time they do this, they'll be prompted to log in to Jira. This is where they should use their own Jira login credentials, not the admin credentials.
User login credentials are saved in the back-end with the logged-in Hyperproof user. The recommended workflow is for each Hyperproof user who will be integrating tasks with Jira to enter their user credentials in the task window as described above.
If a Hyperproof user needs to update their Jira credentials, they should go to Hyperproof Settings > Connected accounts. They should then locate the Jira task integration credentials card and disconnect. After they've disconnected, they can go back to the task window, initiate a Jira interaction, and re-enter their user credentials.
Connecting Hyperproof to Jira Cloud
Note
Only Hyperproof administrators can configure the Hypersync for Jira Cloud.
Your Jira administrator may need to be added to Hyperproof as a Hyperproof administrator to complete the initial app authorization during the connection configuration.
Note that only administrators can configure the Hypersync for Jira Cloud.
From the left menu, select Settings.
Select Integrations.
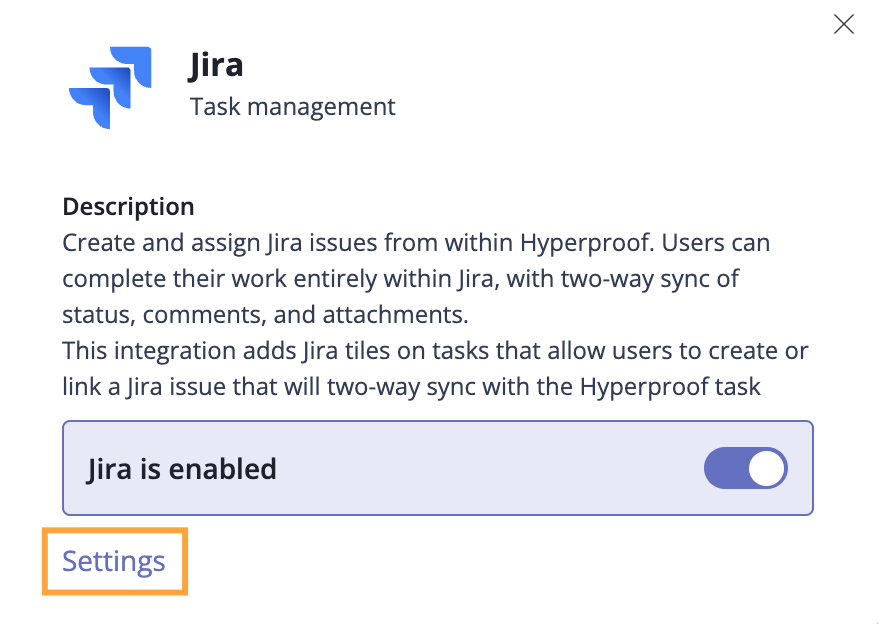
Below Enabled, select Jira.
The Jira window opens.
Click Settings.
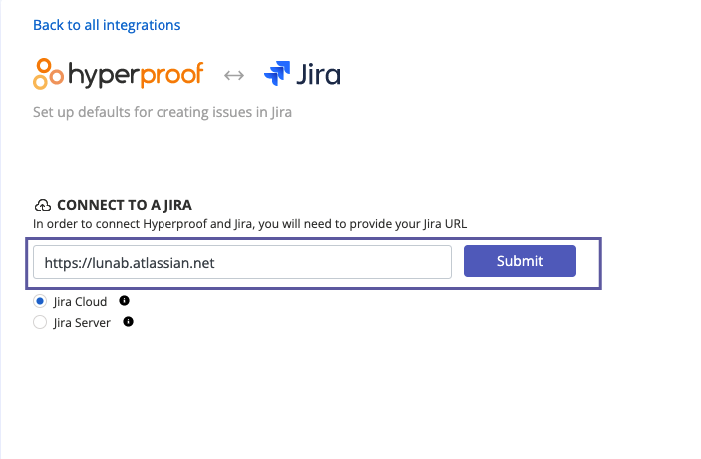
Enter your organization's Jira URL, then click Submit.
Tip
Be sure to include the scheme, e.g.
https://.The Authorize app window opens.
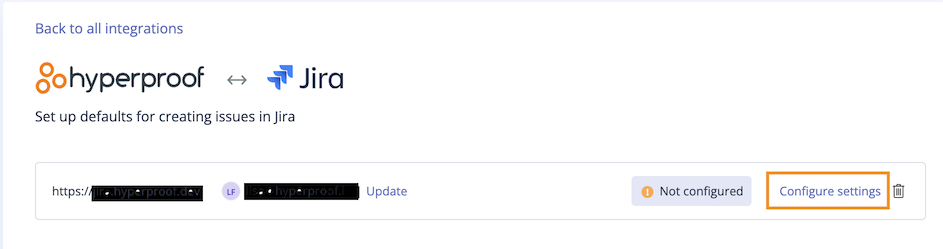
Log in to your Jira account, then click Accept. If an error is received, verify the URL you entered in the previous step.
Click Configure settings.
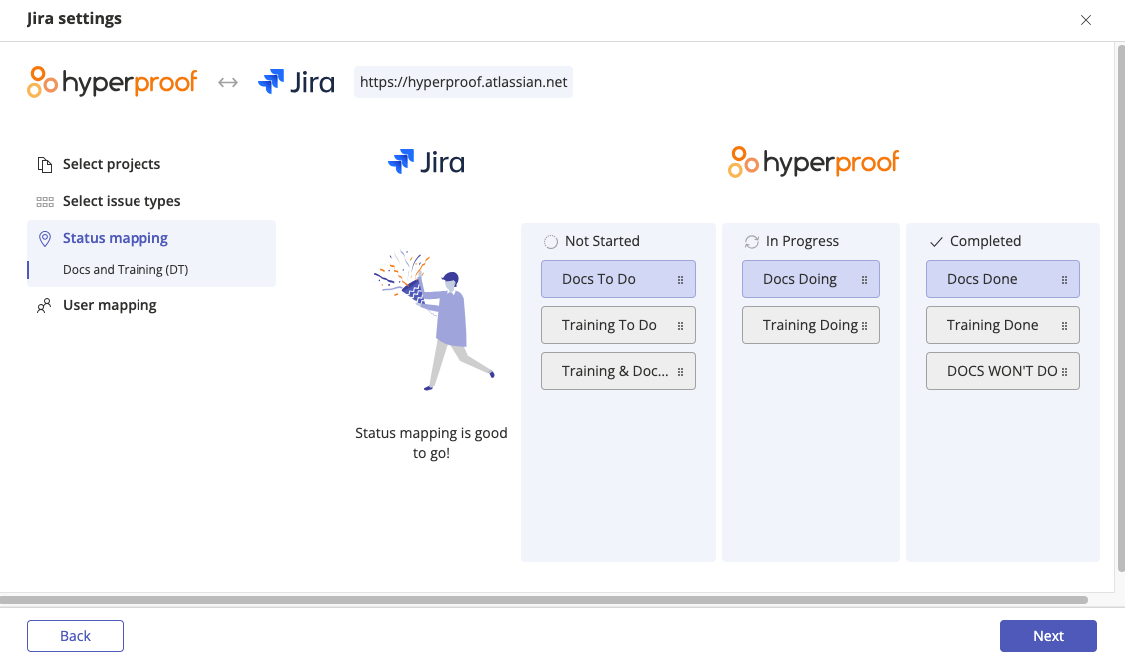
The Jira settings window opens.
Select the checkbox next to the Jira project or projects you want to connect, then click Next. Note that if you select more than one Jira project, you’ll need to map statuses for each project.
From the drop-down menu, select a default issue type, then click Next. Note that you can change the issue type when creating a new ticket.
Map a Jira status (e.g. To Do) to a Hyperproof status (e.g. Not Started) by dragging the Jira status to the Hyperproof status. Refer to the screenshot below for the recommended workflow.
Note
At this time, Hyperproof does not support complete Jira state transitions. For more information about status mapping, refer to Jira status mapping.
Note
If you selected more than one Jira project, you’ll need to map statuses for each project.
Click Next.
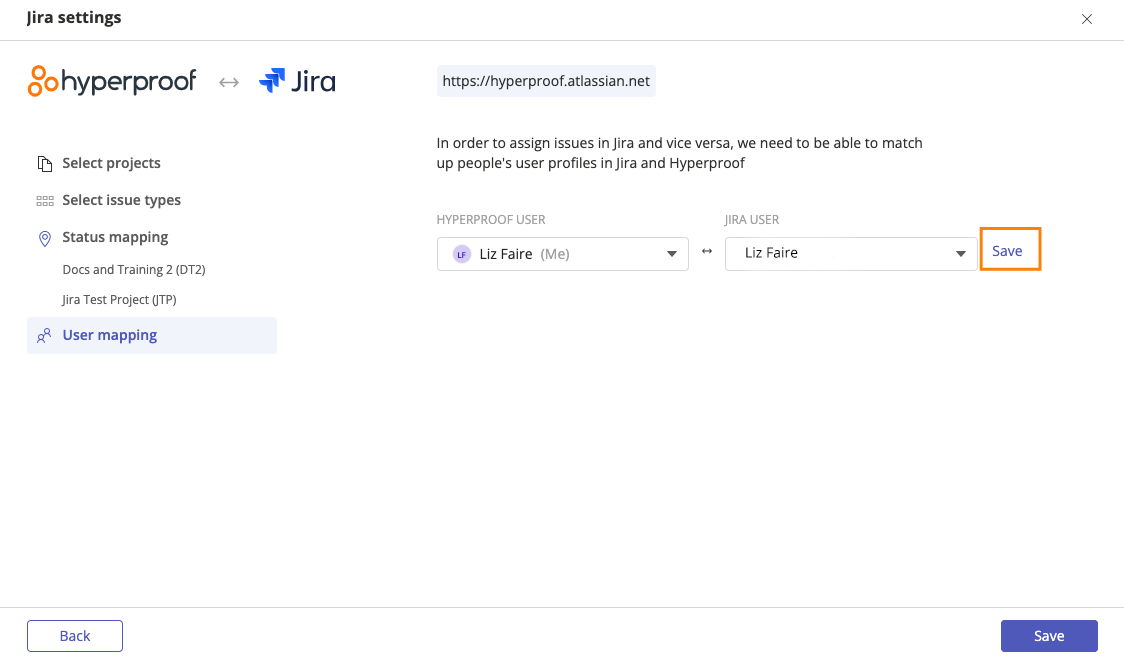
Map Hyperproof users to their Jira profiles.
From the Hyperproof user drop-down menu, select a user. From the Jira user drop-down menu, select the profile that matches the user you selected from the Hyperproof user drop-down menu.
Tip
The list of Jira profiles in the drop-down menu doesn’t include every Jira profile. You may need to search for the Jira profile you want to map.
Next to the Jira user drop-down menu, click Save.
Repeat steps 13 and 14 as necessary.
Click Save.
Jira is now configured. Should you need to change any settings, such as default story type or mapping status, refer to Editing Jira settings.