Evaluating risks
Roles and permissions
The following roles can evaluate risks:
Anyone with manager permissions for the assessment
Anyone with manager permissions on the evaluation
You’ll do the majority of your assessment work in the Evaluations tab. From here, you can assess risks and record your findings. You also have the option to assign evaluation work to different team members. As always, you can communicate with team members about a particular evaluation via the Activity Feed.
This article explains how to assess evaluations linked to risks in a risk assessment. For information on evaluating controls or requirements, see Evaluating controls, requirements, and risks. For information on evaluating proposed risks, see Evaluating proposed risks.
Tip
Active evaluations can also be accessed via Work items. From the left menu, select Work items, then select the Evaluations tab.
A note about the risk evaluation user interface
The risk evaluation user interface differs from the control and requirement evaluation user interface. These differences are intentional and reflect ongoing efforts to improve usability, accessibility, and overall user experience. The updated interface is designed to make your time spent evaluating a risk smoother and more efficient.
Risk evaluations feature a new split pane view. The left pane contains information about the target object, i.e., the risk being evaluated, while the right pane contains information about the evaluation itself, such as linked objects, proof, and so on.
Note
The fields displayed in the left pane reflect the risk fields selected during the assessment creation process. For example, if you only selected 'inherent risk', 'inherent impact', and 'mitigation', only those three fields would appear in the left pane.
Evaluating risks
Note
When the risk evaluation status is set to Approved, Hyperproof updates the original risk record with any changes made to the risk fields being evaluated.
From the left menu, select Assessments.
Select your assessment.
Select the Evaluations tab.
A list of evaluations is displayed.
Select the evaluation you want to assess.
From the left pane, do any or all of the following:
Change the status of the evaluation
Note
When an evaluation is marked as 'Approved', a confirmation window displays, alerting the user that the associated risk will be automatically updated using the values from the evaluation. Once an evaluation is approved, the status can't be changed.
The fields that appear in the left pane are determined by the evaluation fields chosen during the creation of the risk assessment. You can:
Change the name of the evaluation.
Set the inherent risk, inherent likelihood, inherent impact, rationale, and/or tolerance.
Inherent risk - The level of risk if no mitigation is performed. This value is determined by the risk being evaluated.
Inherent likelihood with rationale - The measure of a risk occurring without any preventative measures (controls) in place. This value is determined by the risk being evaluated.
Inherent impact with rationale - The measure of impact an event has on an organization when there are no preventative measures (controls) in place. This value is determined by the risk being evaluated.
Tolerance - The level of risk that an organization is willing to bear. This value is determined by the risk being evaluated.
Set or change the risk category - The category is the classification to which the risk belongs, e.g., Breach. This value is determined by the risk being evaluated.
Set or change the response action.
Set or change the owner - The owner is the individual in your organization responsible for the risk. This value is determined by the risk being evaluated.
Enter or edit the description - The description is an overview of the risk. This value is determined by the risk being evaluated.
Set or edit any custom fields associated with the risk.
View or link controls - Displays controls that are linked to the risk. This value is determined by the risk being evaluated.
Set or edit mitigation and rationale values for linked controls
From the right pane, do any or all of the following:
Click the facepile to manage user permissions for the evaluation.
Hover over the current description to change it.
Expand the Research section to add tasks or surveys.
Surveys must be configured first from the Assessments > Risk Surveys tab.
Note
If you are evaluating a proposed risk created by a risk intake survey, you can view the survey response by clicking the survey title in the Research table. See Evaluating proposed risks.
Expand the Details section and do any or all of the following:
Set the evaluation priority.
View the evaluation source.
Edit the due date.
View the Created on and Updated on dates
Enter your observations
Expand the Assignee section and do any or all of the following:
Change the current assignee or group.
Expand the Past evaluations section to link to a previous evaluation (these are previously approved evaluations related to the risk being assessed).
Expand the Linked objects section to link a related object to the evaluation.
Expand the Related issues section to link related issues to the evaluation.
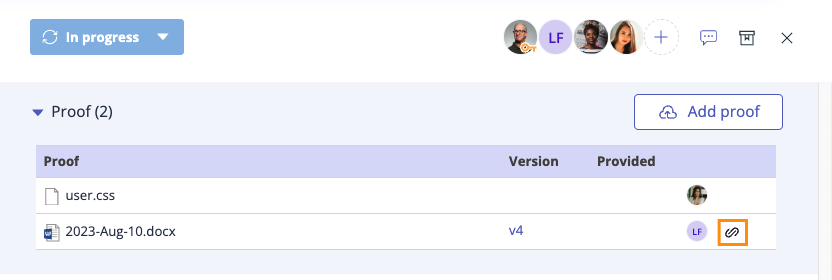
Expand the Proof section to link proof to the evaluation.
Tip
Proof that is indirectly linked to the evaluation is shown with an Indirect link icon.
Communicate with team members via the Activity Feed.
Tip
Looking to score controls (either numerically or categorically)? Create a custom field on your evaluations.