Creating an ISO 27001 Statement of Applicability
Roles and permissions
The following roles can create a Statement of Applicability in Hyperproof:
Administrators
Compliance managers
The steps below explain how to create an ISO 27001 Statement of Applicability (SOA) in Hyperproof.
Step One: Create your ISO 27001 program
Skip this step if you already have an ISO 27001 in Hyperproof.
From the left menu, select Programs.
Click New.
The Select template window opens.
Search for ISO 27001, then select it.
The Review template window opens.
Click Next.
The Create program window opens.
Enter a name for your program and, optionally, a description.
Select the checkbox labeled I confirm that my organization has a license to this content.
Click Create.
Step Two: Create custom fields
Custom fields allow you to track anything you want on most Hyperproof objects. The custom fields you create here are linked to your program's requirements. They'll help you keep track of important information, such as implementation details and justifications. They are also visible on SOA reports.
Note
Only Hyperproof administrators can create custom fields.
From the left menu, select Settings.
Select Custom fields.
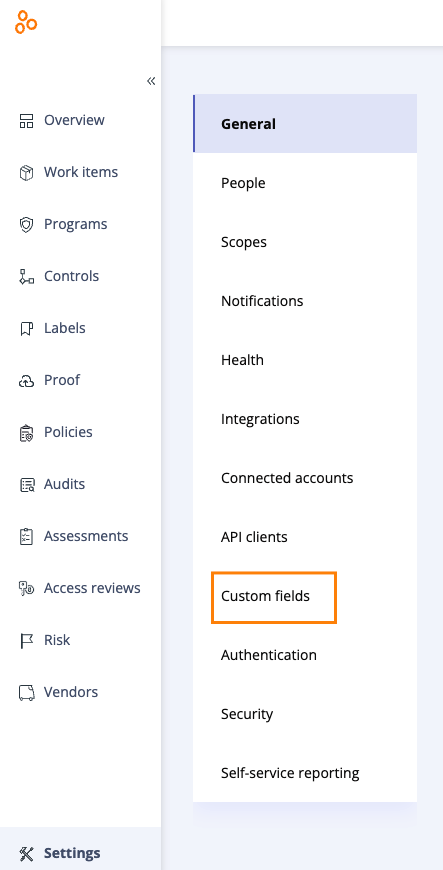
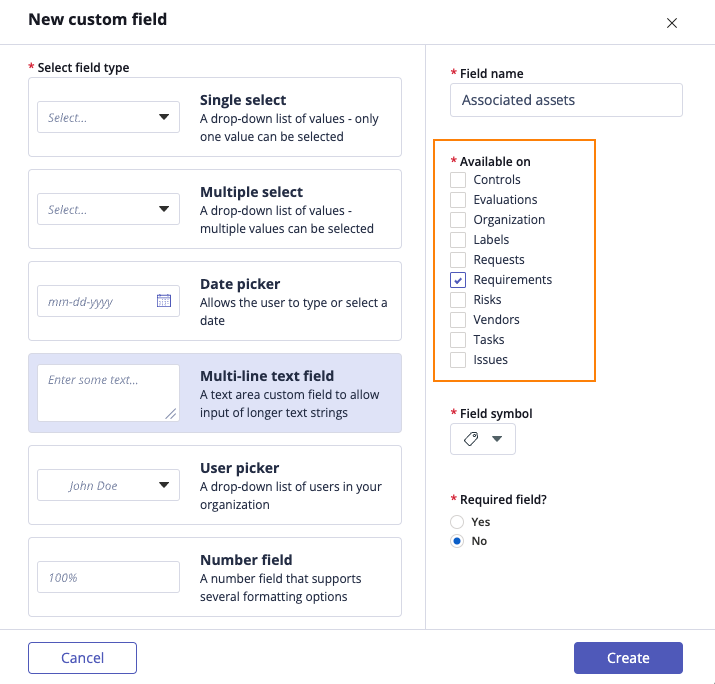
Click New.
Collaborate with your auditor to determine the necessary fields. Common fields include:
Field name
Custom field type
Associated assets
Multiple-select OR multi-line text
Date of implementation
Date picker
Implementation details
Multi-line text or select options for approach, e.g. NIST 800-53
Justification
Multiple-select (e.g. business, contracting, legal, risk) OR multi-line text
Owner
User picker or open-text
Once the fields are determined, be sure to assign them to Requirements.
Note
For more information on creating custom fields, refer to Creating a custom field.
Step Three: Modify Annex A controls
From the left menu, select Programs.
Select your program.
Select the Requirements tab.
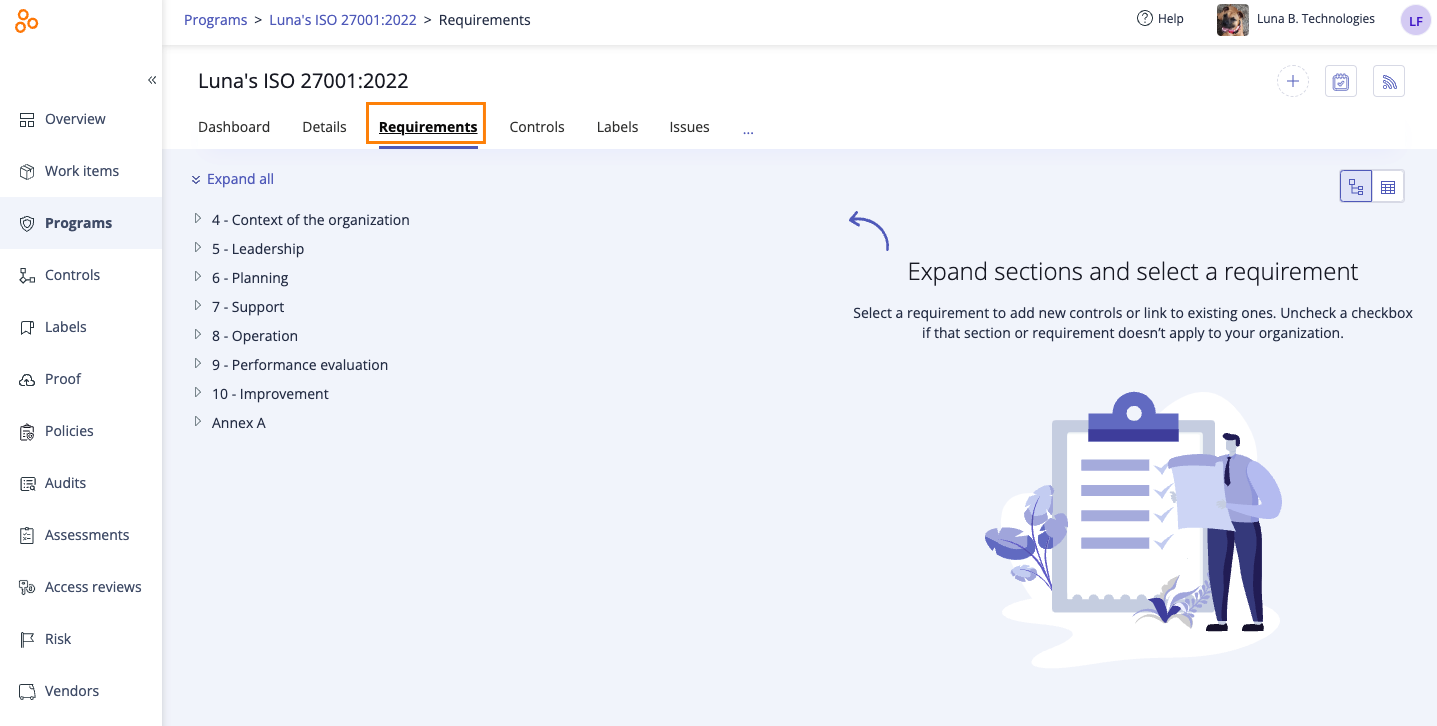
Click the Tree view icon.

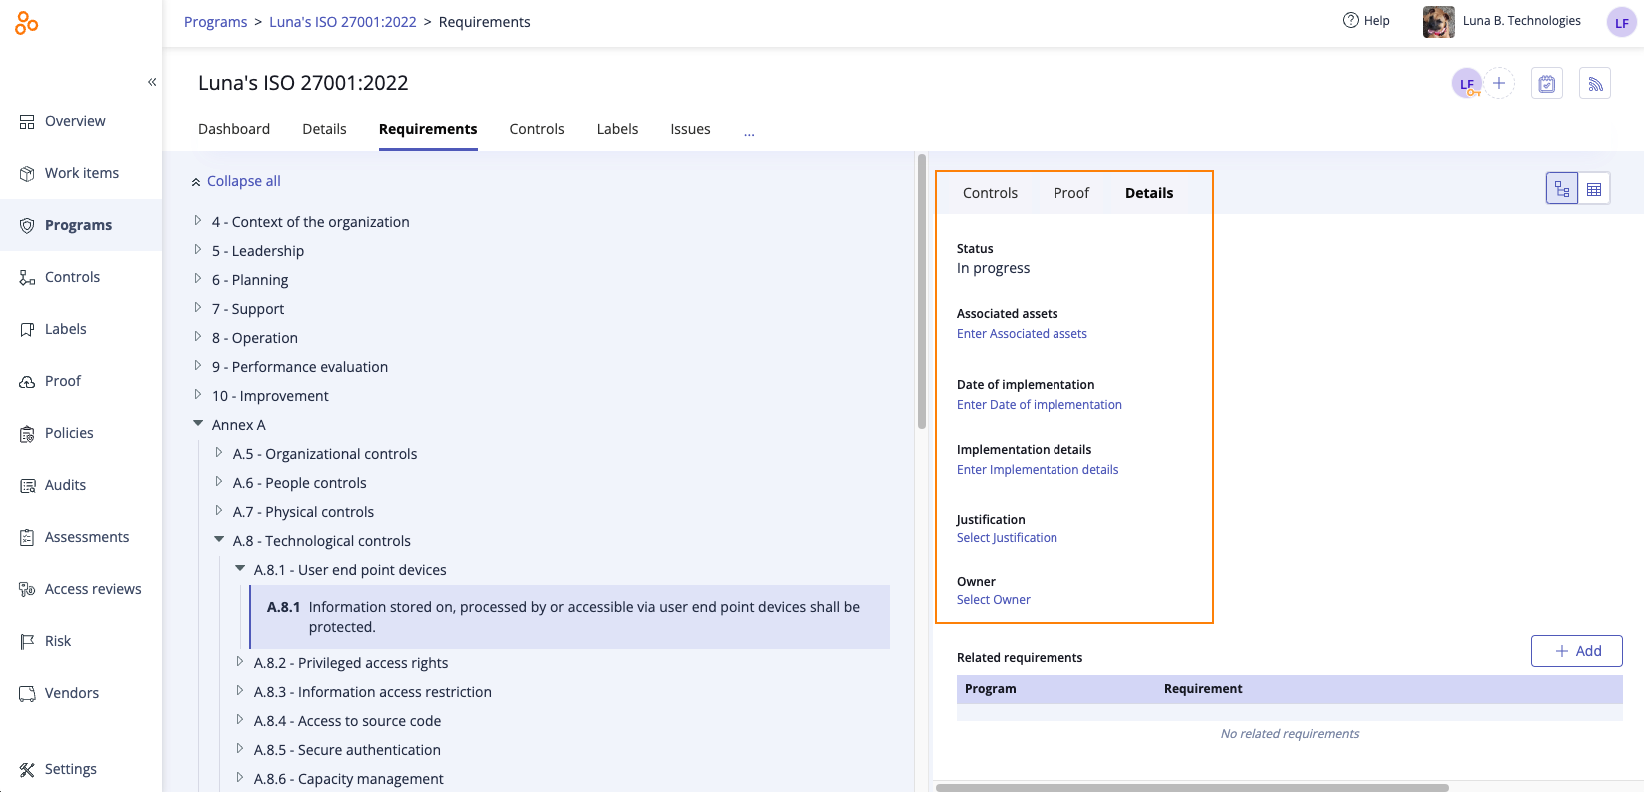
Modify Annex A controls by adding details such as exemption policies, department responsibilities, or organizational documents.
Tip
Annex A controls serve as references for controls. Based on organizational needs, you can adopt, tailor, or replace them.
Optionally, replace Annex A controls with custom descriptions or controls from frameworks like NIST 800-53.
For consistency, ensure alignment of controls across all of your programs.
Review each Annex A control and provide the following:
Status (In progress, Completed, Not started, Not applicable)
See Changing the status of a requirement for more information.
Implementation details (include customized approaches or references)
Date of implementation and last assessment
Owner assignment and associated assets
Justification
Where necessary, mark controls as "Not applicable" and add the justification, e.g. "No facilities for a clear desk rule".
Step Four: Create reports
You will need to create two reports. The first is the primary SOA report and the second includes the justifications of non-applicable requirements.
To create the first report:
Select the Requirements tab.

Click the Grid view icon.

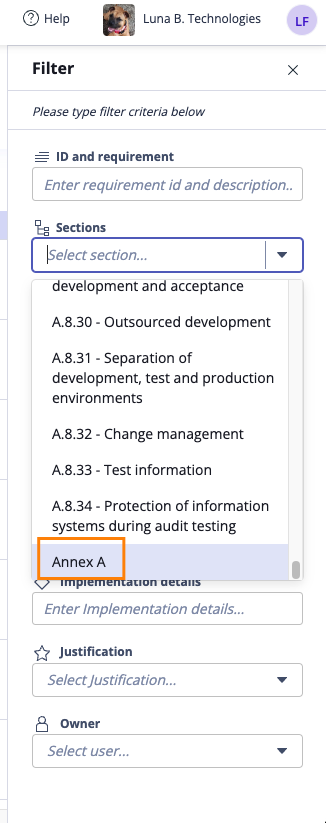
Click the Filter icon.Filter by section to include only Annex A requirements.
From the Sections drop-down menu, scroll to the bottom, then select Annex A.
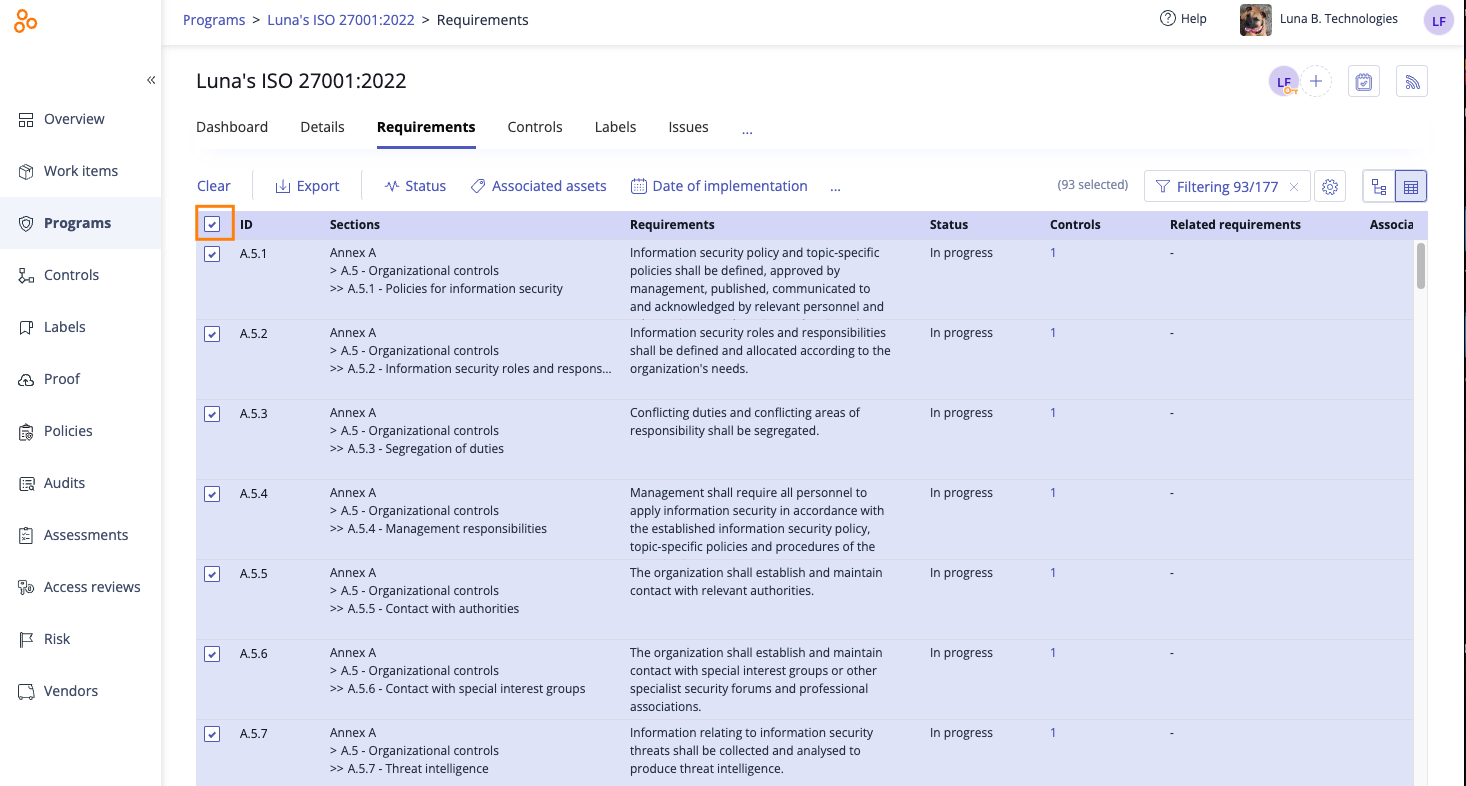
Select the All checkbox in the upper-left corner.
Tip
If you have additional custom fields you don’t want included in the report, select the Gear icon in the upper-right corner, then clear the checkbox next to any unwanted fields.
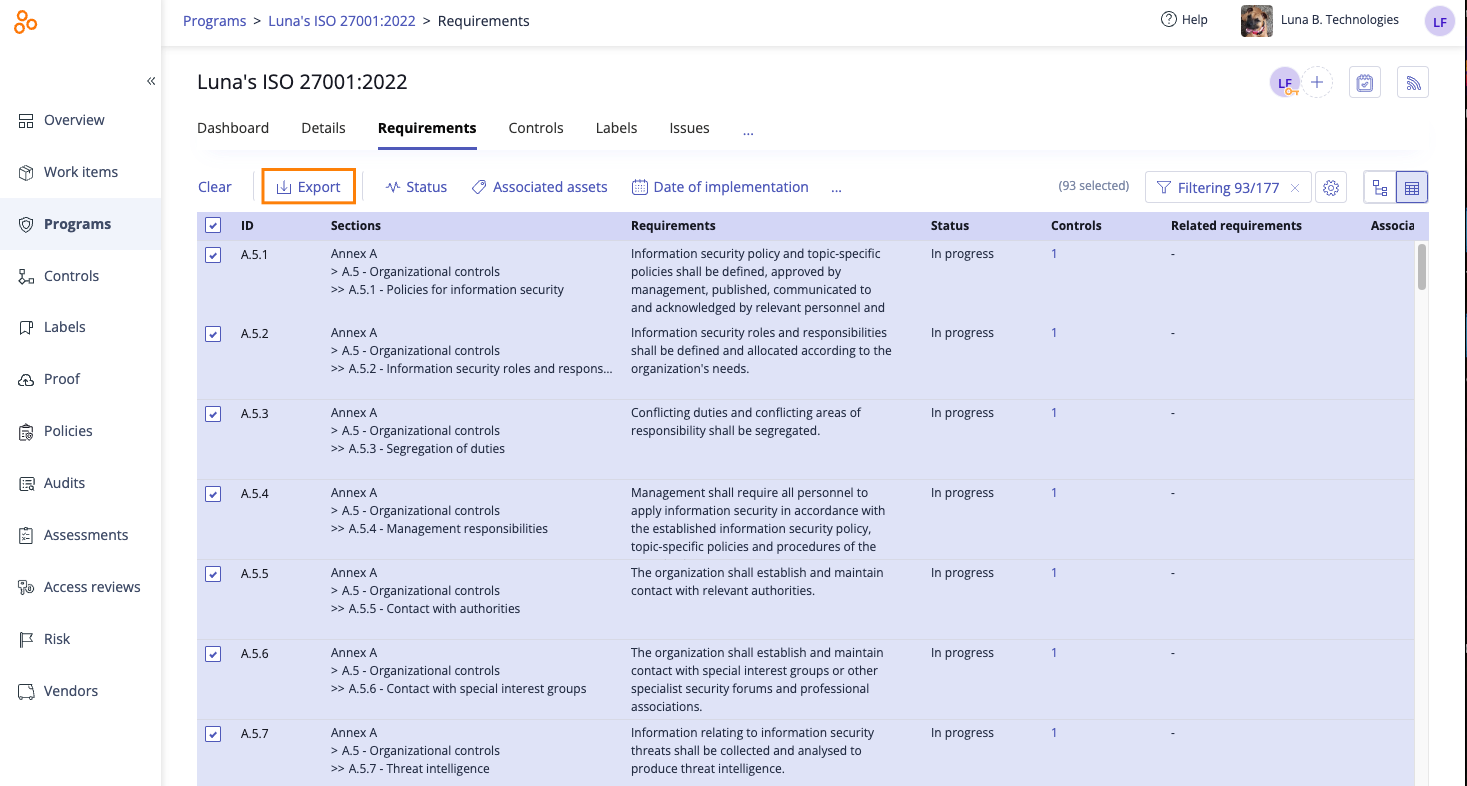
Click Export.
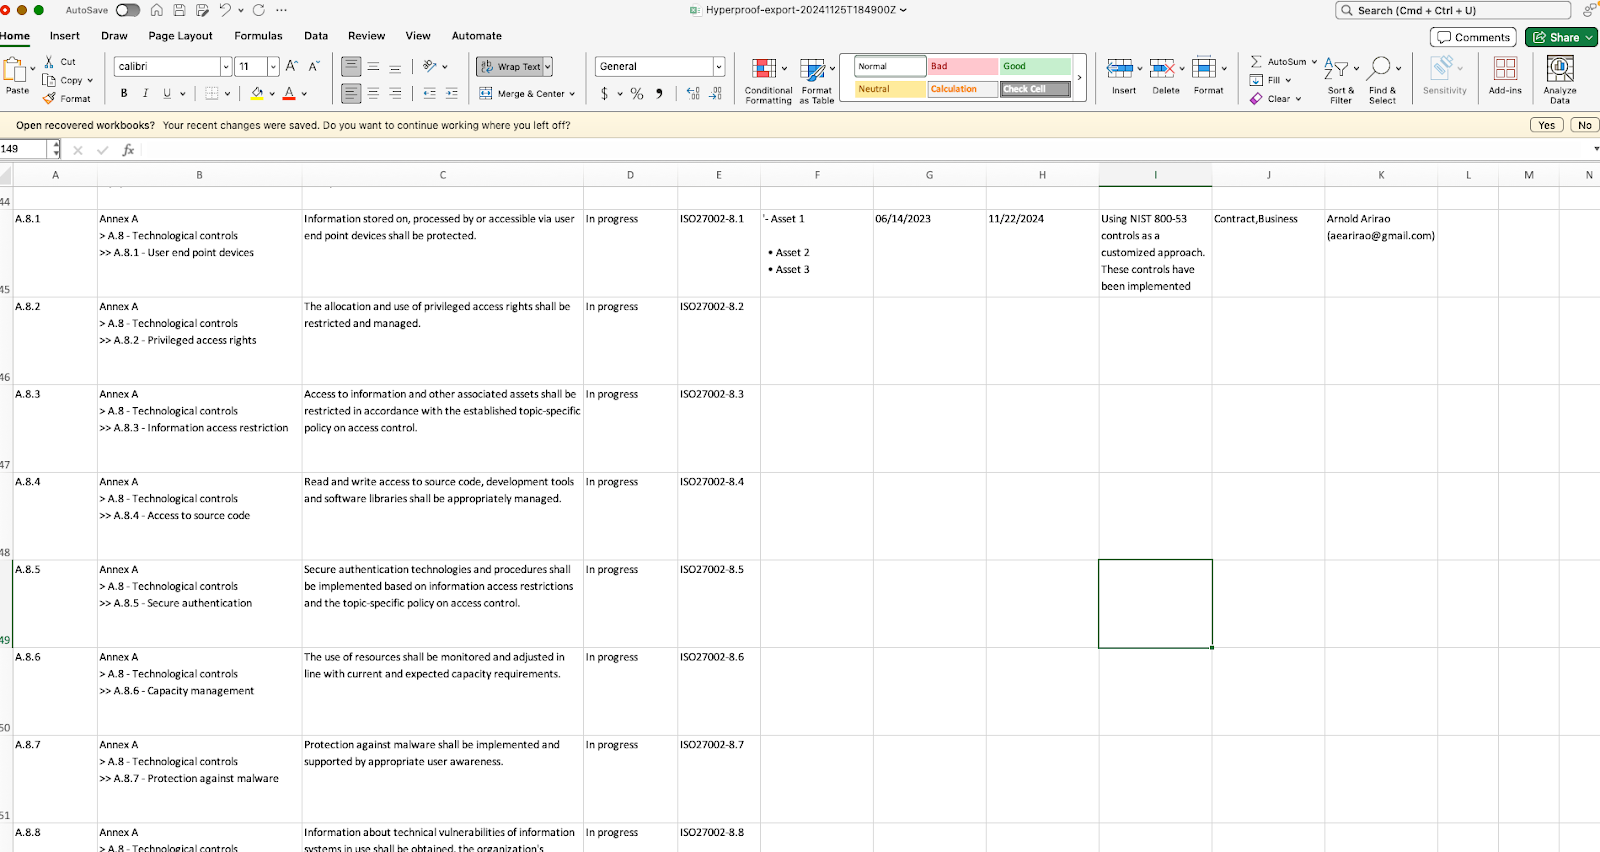
This initial report includes IDs, sections, statuses, mapped controls, and custom fields.:
To create the second report:
Select the ... (More options) tab, then click Export program.

In the downloaded file, you'll find:
Requirements.csv - This is a list of requirements that includes non-applicable justifications. Note that you’ll need to create a filter in the XLSX file and filter the requirements based on a "Not applicable" status.
Combined.csv - This file contains requirement and control information that can be used to discover all of the controls linked to your ISO 27001 requirements.

Tip
Optionally, you can combine the two reports.
If justifications from the second export are needed in the primary report, use Excel or another tool to merge the data.
Step Five: Finalize and review
Finalize the SOA by ensuring all fields are complete, and validate the data aligns with the expectations of your auditor. Review the final report to confirm it includes all necessary information for Annex A compliance.
FAQs
What fields MUST be included in the SOA?
How do I include risks in the SOA?
What is a Risk Treatment Plan?
The Risk Treatment Plan example above doesn't include the field "In Place". Should I add this?
I don't see my justifications for "Not applicable" requirements in the report. Where can I find this?
When I view other programs, like SOC 2 or PCI DSS, I see the custom fields I created for ISO 27001. Is there a way to hide these?
Creating an ISO Statement of Applicability video tutorial
Watch this short video about how to use Hyperproof to create an ISO SOA.